Rebecca Sedwick Collab


 >
>


Tag made for me

Spookalicious FTU

Spookalicious
This tut assume your have a Good working knowledge of PSP.
Kit: Ookie Spooky, by Kittz Kreationz you ca get it here.
Tube: Elias Chatzoudis, you can purchase here.
Mask: MC_Mask16, by Mellisa's Creationz you can get it here.
Template: AR315_Template59, by Aqua Rebel you can get it here.
Fonts:The Nautical Gal, pay font
Shadow: 3,3, 36, 6
Filters: None
PSP Filters used: None
sa-f-df-nl= Select All, Float, Defloat, New Raster Layer.
sa-f-df= Select All, Float, Defloat.
c/p= copy & paste
sa=select all
sn=select none
Let's begin.
Open your tube and template.
In the template delete the first 3 layers and the Go Away layer.
Click on the background layer and add a new layer, sa, c/p p3 into selections.
Select the Halftone layer, sa-f-df-nl, c/p P2 into selelctions, sn, hide template layer.
Move your new halftone layer to the left of your image, duplicate and mirror.
Select Glitter Strip 1, greyscale this layer (Adjust, Hue & Sat set to 0)
Go to Adjust, Colour balnce, manual colour correction, Source colour# 959595,
Repeat this step for the Rectangle 2, Glitter Strip 2, and Gradient Circle layers.
Select the Strip 1 layer, sa-f-df, c/p P4 as a new layer, selelctions invert and hit delete.
Repeat this step for Rectangle 1 & 3, and Strip 2 layers.
Select Shape 1, sa-f-df, c/p P2 as new layer, selections invert and hit delete,
Select the Black circle layer, sa-f-df-nl, c/p P5 into selections, sn, hide the template layer.
C/P your tube as a new layer, move to the top of your layer pallet. I resized my tube 80%.
Add your elements.
Wordart @ 80%
Star Dangle @ 40%
Broom @ 80%
Skull Brad @ 50%
SpiderWeb
Sparkles
Spiderweb Brad @ 50%
Add your copy right and text.
All done.
Scream My Name FTU

Scream My Name
This tut assume your have a Good working knowledge of PSP.
Kit: by KittzKreations, you can get it here.
Tube: Keith Garvey, Glitter-PTE0972 you can get it here.
Mask: Melissa's Creationz, MC_Mask11, you can get it here.
Template:Temp-175, you can get it here. She has her templates listed on the left.
Fonts:Sunshine Poppy, you can get here
Shadow: 3,3, 36, 6
Filters: DSB, Bright Noise, settings 33, Mix
PSP Filters used:
sa-f-df-nl= Select All, Float, Defloat, New Raster Layer.
sa-f-df= Select All, Float, Defloat.
c/p= copy & paste
sa=select all
sn=select none
Let's begin.
Open tube and template, duplicate the template and close the original.
Delete the credits layer.
Image, Canvas size 600x600.
Select bottom layer and add a new layer, move this layer to the bottom of
the layer pallet, sa, c/p P8 into selections, sn, apply mask and merge group.
Select Pink Square 2 layer, sa-f-df-nl, c/p 7 into selections, sn, hide template layer.
Repeat this step for the other pink square layer.
Select the Black Circle layer, sa-f-df, c/p p8 as new layer, selections invert hit delete.
Select WordArt layer, greyscale this layer, (Adjust, Hue & Sat both at 0)
Go to Adjust, Colour Balance, Manual colour Correcton,
Using magic wand click inside White Frme layer, C/P your tube (layer 1) as new layer,
C/P Layer 1 in your tube layers as a new layer and move slightly to the right.
Duplicate the Wordart layer and move this layer above the tube layer you just added,
Add your elements.
Add your copy right and text.
All done.
Restraining Order FTU

Restraining Order
This tut assume your have a good working knowledge of PSP.
Kit: Vampire Diaries, by Polkadot Scraps you can get it here.
Tube: Vamp Glamour (pte4221) Keith Garvey, you can get it here.
Mask:Vix-BigMask018 you can get it here (3rd one down, just click and save.
Template:from Creative Misfits, you can get it here
Fonts:Variety, you can get it here
Shadow: 3,3, 36, 6
Filters: None
PSP Filters used: None
sa-f-df-nl= Select All, Float, Defloat, New Raster Layer.
sa-f-df= Select All, Float, Defloat.
c/p= copy & paste
sa=select all
sn=select none
Let's begin.
Open your tube and template. In the template delete the credit layer,
Unhide the Raster layer (at the bottom), sa, c/p paper 6 into selelctions, sn,
Apply your mask and merge group.
Select white circle layer, sa-f-df, c/p paper 6 as new layer, invert selections and
hit delete.
Select the Black Circle, sa-f-df-nl, c/p paper 7 into selelctions, keep selections,
c/p tube (if you are using the same tube it's layer 3) as new layer selections invert hit delete.
Change the blend mode to Soft Light.
Select the Red Circle Dot layer, sa-f-df-nl, c/p paper 6 into selelctions, sn, hide template layer.
Select RT Red layer, sa-f-df-nl, c/p paper1 into selelctions, sn.
Repeat this step for Left Red layer.
Select LT Background layer, sa-f-df-nl, c/p paper 10 into selelctons, sn, hide template layer.
Select Left Black, sa-f-df-nl, c/p paper 6 into selections sn, hide template layer.
Repeat this step for Restraining layer.
Select Bottom White layer, sa-f-df, c/p paper5 as new layer, selections invert hit delete.
Hide template layer.
Select Bottom Red layer, sa-f-df, c/p paper 7 as new layer, selections invert and hit delete.
Select Go To Hell layer, greyscale this layer using the Adjust, hue & saturation, settings at 0.
Go to Adjust, Colour Balance, Manual Colour Corrections, Source colour #808080, target colour #963C46.
Now to add the elements, see finished tag for placements. I used the following:
PDS_VD_scatter, c/p as new layer, free rotate 90 Right.
PDS_VD_Crow @ 25%
PDS_VD_Clock
PDS_VD_Ribbon1 @ 50%
PDS_VD_Flower3 @60%
PDS_VD_Swirl
Add your copy right and text.
All done.
Be Very Afraid PTU

Be Very Afraid
This tut assume your have a good working knowledge of PSP.
Kit: Wicked Creation Scraps, this is such a great kit for halloween tags,
Thanks so much for letting use your kit for this tut.
Tube: Barbara Jensen, you must have a license number to use this tube.
Mask:Vix_Big Mask017, you can get it here
Template: Temp194, here download the set they are great!
Fonts:Gorestep, (dafont.com)
Shadow: 3,3, 36, 6
Filters: DSB Bright Noise, setting 43 Mix,
PSP Filters used: Noise,
sa-f-df-nl= Select All, Float, Defloat, New Raster Layer.
sa-f-df= Select All, Float, Defloat.
c/p= copy & paste
See finished tag for placement of elements, tube and text.
Let's begin.
Open tube and template. Duplicate your template and close the original.
Delete the credits layer.
Increase your canvas size to 700x700.
Select the bg layer, sa, c/p pp6 into selections, sn.
Apply your mask layer and merge group.
Select Tilted Rect 1, sa-f-df-nl, c/p pp4 into selelctions, sn.
Repeat this step for Tilted Rect 2 layer.
Select the White Circle Frame layer, sa-f-df, c/p pp9 as a new layer selections invert and hit delete.
Delete the white circle layer, apply DSB bright noise, or Noise filter in psp (65, uniform, monochrome).
Select the Black Circle layer, sa-f-df-nl, c/p pp5 into selelctions, sn.
C/P your tube as a new layer, resize 75%, position just below the "be very afraid" layer in your layer pallet.
Add a drop shadow to all your layers.
Add your elements, I used the following:
Element 42, c/p as new layer move to the left, duplicate and Image Mirror.
Element 32 @ 85%
Element 3 @ 45%
Element 22 @ 55%, c/p as new layer, free rotate 45 Left. move to the left and duplicate, image mirror.
Element 09 @ 15%, c/p as new layer, free rotate 90 Left.
Element 15 @ 30%
Element 6 @ 30%
Add a dropshadow to all layers.
Add your © and text and your done.
Why Try PTU

Why Try
This tut assume your have a good working knowledge of PSP.
Kit: Lilac Summer, by KnC Scraps @ Scrappin Dollars
Tube: Birds Of A Feather by Barbara Jensen. You must use a license# when using this tube.
Mask:Mask of choice.
Template:Template_136 by Blissfully Beth,
Fonts:Rage Italic, pay font
Shadow: 2,2, 36, 6
Filters: None
PSP Filters used: Inner Bevel
sa-f-df-nl= Select All, Float, Defloat, New Raster Layer.
sa-f-df= Select All, Float, Defloat.
c/p= copy & paste.
See finished tag for placements of elements and tubes.
Let's begin.
Open your tube and template, duplicate the template and close the original.
In your template delete the background and credits layer.
New layer, move to bottom of Layer pallet, sa, c/p pp8 into selelctions,
We'll start with the frames first.
Select Black Rectangle Frame, sa-f-df-nl, c/p pp10 into selections,sn, hide template layer.
Apply the following bevel.
Repeat this step for all the black frames.
Select Horizontal Line 1, sa-f-df,c/p pp10 as a new layer, move your paper up,
Repeat this step for the other horizontal line layer.
Select the Grey rectangle layer, sa-f-df-nl, c/p pp1 into selectons, sn, heide template layer.
Repeat this step for the 2 White Circle layers.
Select the white circle background 2 layer, sa-f-df, c/p your close up tube as a new layer position, select invert and hit delete.
Change your Blend Mode to Luminance.
C/P your full tube as a new layer, position and add a drop shadow.
On the wordart layers, go to Adjust, Brightness and Contrast, Brightness set at 0.
Go to Adjust, Colour Balance, Manual Colour Correction,
Add your elements, I used the following:
Branch @ 45%
Element 7 @95%
Element 3 @45%
Petals @ 50%, position bottom left and duplicate image flip & mirror.
R4 @ 65%
Butterfly @ 65%
Bird @ 20%
Add your copy right and text.
All done.
Thank you for trying my tut.
Pixie Magic PTU

Pixie Magic
This tut assume your have a working knowledge of PSP.
Kit: Pixie Magic by Angel's Designz,thank you for letting me use this amazing kit!!
Tube: by Caron Vinson, Mysic Moon you can get it here Please use license when using her art work.
Mask:Supplied below,just click on pic for download link.
Template:Template 61 by AquaRebel, you can find it here.
Fonts:Wizard Magic you can download from Dafont.com
Shadow: 1,1, 36, 6 add as you complete each step.
Filters: Xero Fritillary, DSB Bright Noise,
PSP Filters used: Noise,
sa-f-df-nl= Select All, Float, Defloat, New Raster Layer.
sa-f-df= Select All, Float, Defloat.
sa=select all
sn=select none
c/p= copy & paste
Let's begin.
Open your tube, mask and template, duplicate and close the original.
In your template delete the credits, wording, wordart by Aqua, tone, glitter backing wordart layers & heart antique layer.
Click on background layer, add new layer, sa, c/p paper 8 into selelctions, sn, apply your mask and merge group.
Select Heart circle 1, sa-f-df-nl, c/p paper 3 into selections, sn, hide template layer and add a
noise setting of your choice. I used Gaussian, 50, Monochrome.
Repeat the above step for the other heart cirlce.
Select glitter rectangle 1, sa-f-df-nl, c/p paper 3 into selections, sn, apply Fritillary filter
using these settings, 5, 30, 10, 36.
Repeat the above steps for Glitter Rectangle 2, Fritillary Heart layers.
Select the Grad Rectangle 1 layer, sa-f-df, c/p paper 2 as new layer, invert selections and hit delete.
Hide template layer. Repeat this step for the other Grad Rectangle layer.
Select the Glitter heart layer, sa-f-df-nl, c/p paper 4 into selelctions, sn, hide the template layer
Add DSB Bright Noise filter, settings 30, Mix, or Add Noise, using the noise settings above.
Select the Red Heart layer, sa-f-df-nl, c/p paper 8 into selections, sn, hide template layer.
Make sure you are still on your new Heart layerm sa-f-df, c/p AD Ele2 file as new layer resize 80%, postion, invert selections and hit delete.
Finish adding the rest of your elements. I used the following:
AD_Swirl @ 75%
AD_Grass @ 80%
AD_Lotus @ 80%
AD_Ribbon @ 50%
AD_Ele1 @ 100%, c/p as new layer move to the left, duplicate and mirror.
AD_Ribbon2 @ 100%, Immage Mirror.
AD_Butterfly2 @ 40%
Add your copy right and text.
All done.
Thank you for trying my tut.
.75 cent Sale at Scrappin Dollars!!
 Today & tomorrow only!
Funny Fall PTU

Funny Fall
This tut assume your have a working knowledge of PSP.
Kit: Rustling Leaves by Dark Moon Dreams you can purchase it here
Tube: Autumn Girl by Toosh Toosh, you must have a license to use this art.
Mask:None
Template:Missy_tagtemplate179 you can get here.
Fonts:Font of choice
Shadow: 3,3, 36, 6
Filters: Xero Fritilary
PSP Filters used:
sa-f-df-nl= Select All, Float, Defloat, New Raster Layer.
sa-f-df= Select All, Float, Defloat.
c/p= copy & paste
Let's begin.
Open up your tube & template, duplicate th template and close the original.
Delete the credits layer in your template.
Select Rectangle2 layer, sa-f-df-nl, c/p PP08 into selections, select none, delete template layer.
Select Rectangle1 layer, sa-f-df-nl, c/p PP09 into selections, select none, delete template layer.
Select RicRac layer, sa-f-df, c/p PP02 as new layer, selections invert hit delete, delete template layer.
Aplly Xero Fritilary filter use the setting 5, 18,5,43.
Select Circle layer, sa-f-df-new layer, c/p PPo3 into selections, select none.
Apply Fritilary filter again using same settings as above.
C/P your tube as new layer, resize 55%, position, see finished tag.
Duplicate your Circle layer and move to the top of you layer pallet,
circle, see finished tag.
Add your elements.
Add your copy right and text.
All done.
Stat Tut PTU

Stat Tut
This tut assume your have a working knowledge of PSP.
Kit: Rustling Leaves by Dark Moon Dreams you can purchase it here
Tube: Ismael Rac, you must have a Rac license to use this tube.
Mask:None
Template:None
Fonts: Respective
Shadow: 2,2, 36, 6
Filters: Tramages, Wee Scratches (optional)
PSP Filters used: Cutout & Bevel
sa-f-df-nl= Select All, Float, Defloat, New Raster Layer.
sa-f-df= Select All, Float, Defloat.
c/p= copy & paste
Let's begin.
Open a new image 600x250 Select all.
C/P PP09 into selections, selelct none.
Apply Tramages' Wee Scratches twice, setting at 255.
C/P Tube as new layer, set blend mode to Soft Light.
Go to Image, Add Borders, add a Symetric border of 2 pixels colour Black.
Go to Image, Add Borders, add a Symetric border of 15 pixels colour ffff00.
Use your magic wand (tolerance 0) and cick on the yellow border.
C/P PP03 into selections, add a new layer, go to Effects, Cutout, use these settings:
Verticle & Horizontal 10, Opacity 50, Blur 5, Shadow colour #343210, Fill Interior checked, colour #706A26.
Select none.
C/P your tube and position. I've changed the colour of her dress to coordinate with the tag. This is allowed.
C/p Branch02, resize 50%, position, see finished stat.
Add your text and ©.
For the text I used PP09 as a pattern fill and colour #193002 as my forground colour.
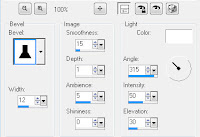
I added a slight Inner Bevel, using the fllowing settings:
Bevel #2, Width 11, Smoothness 32, Depth 20, Ambience 5, Shininess 10,
Angle 315, Intensity 35, Elevation 46, colour White.
Your all done
Sinful PTU

Sinful
This tut assumes your have a good working knowledge of PSP.
Kit: Rustling Leaves by Dark Moon Dreams you can purchase it here
Tube:Jose Cano, you can purchase the tube here. You must have a license to use this tube.
Mask:GH-Grunge Frame 3 by Ginny which you can download here.
Template: Sinful, Collab template by EyeCandy Graphicz
Fonts: Respective, you can download here
Shadow: 2,2, 36, 6
Filters: SB, Bright Noise, Xero Fratillary
PSP Filters used: None
sa-f-df-nl= Select All, Float, Defloat, New Raster Layer.
sa-f-df= Select All, Float, Defloat.
c/p= copy & paste
Hide template layers as you finish each step you can delete them at the end.
Let's begin.
Open your tube and template, duplicate the template and close the original.
In your template hide the merged layer,Small Black Stars, Pink Small Rectangle layers & Right & Left Diamond Squares.
We'll start at the bottom of the layer pallet and work our way up.
Select the Background layer create a new layer, select all c/p PP09 into selections, select none.
Apply your mask and merge group.
Select the Pink Glitter Stars Left, sa-f-df-nl, c/p PP03 into selections, select none, delete this template layer.
Repeat this step for the Pink GLitter Stars Right and the Small Pink Stars Glitter(near the top of the pallet).
Select the Pink GLitter Rectangle layer, sa-f-df-nl, c/p PP03 into selections, select none, apply DSB Bright Noise, settings at 43, Mix selected.
Repeat this step for Pink GLitter Rectangle Smaller.
Select the Black Rectangle layer, sa-f-df-nl, c/p PP02 into selections, select none.
Select ink Circle Right, sa-f-df, c/p PP09 as new layer, move the paper up or down to your liking, selections invert and hit delete.
Apply xero Fratillary filter use these settings, 5, 109, 24, 33.
Repeat this step for the Pink Circle Left.
Select Small Black Square Left, sa-f-df, c/p PP02 as new layer, move the paper up or down to your liking, selections invert hit delete.
Repeat this step for the Small lack Square Right.
Select the Wordart Pixel Sinful layer, change the colour to grey scale
and re-colour to a dark shade of green using the Manual Colour Correction tool, I used #193002.
Select the Wordart "sinful" Pink glitter Left, sa-f-df, c/p PP03 as new layer, selections invert and delete.
Apply DSB Bright Noise use same settings before.
Select the White Rectangle layer, sa-f-df-nl, c/p PP02 into selections, selelct none.
Select Small Black Square Left again, sa-f-df, If you are using the same tube as I am c/p layer 1 as a new layer.
Position your tube and selections invert hit delete. Duplicate your tube layer and Image, Mirror.
Move this layer up on your pallet so that you can see it.
Select the top layer in your pallet, c/p Layer 3 from your tube image as a new layer.
Now you can add your elements, I used the following:
Branch 1, c/p as new layer above the Pink Circle layer, postion, duplicate and mirror. C/p again move down, duplicate and mirror.
Branch 2 @ 50% c/p, as top layer position, duplicate and mirror.
Flower 1 @ 50% 2 times c/p position and Image Mirror
Leaf 3 @ 60% postion & Image Mirror
Ribbon 1 @ 40% position & Image Mirror
Add your copy right and text.
All done.
Bedtime Babe PTU

Bedtime Babe
This tut assume your have a working knowledge of PSP.
Kit: Pink Persuassion by KnC Crapz, thank you for a great kit to work with.
Tube: CCL7, by Barbara Jensen, you must have a license to use her work.
Mask: No Mask
Template: CM_Collab_Temp1 by Cindy/Tonya Collab at Creative Misfits Creations
Fonts: Respective you can find it here
Shadow: 2, 2, 36, 6
Filters: None
PSP Filters used: None
sa-f-df-nl= Select All, Float, Defloat, New Raster Layer.
sa-f-df= Select All, Float, Defloat.
c/p= copy & paste
Let's begin.
Open your tube and template.
In your template hide the following layers:Credits, Word art, word art backing, Mask, hearts and stars dotted lines.
Staring with the bottom layer we'll work our way up.
Select Black Square 2 sa-f-df-nl,c/p paper 6 into selctions, select none hide template layer.
Repeat step for Black Square 1 layer.
Select Black Circle 2, sa-f-df-nl, c/p paper 10 into selections, selelct none hide template layer.
Repeat for Black Circle 1, and Black Circle.
Select Pink Circle 2, sa-f-df, c/p paper 4 as new layer, selections invert hit delete, hide template layer.
Select Pink Circle 1, sa-f-df, c/p paper 4 as new layer, Move paper up slightly, selections invert hit delete, hide template layer.
Select Pink Circle, sa-f-df-nl, c/p paper 4 into selections, select none hide template layer.
Select the Black Rectangle, sa-f-df-nl, c/p paper 3 into slelections, hide template layer.
Repeat the above step for Pink Back Rectangle.
For both of the rotated rectanlges, sa-f-df-nl, c/p paste paper 1 into selections, select none, hide template layer.
Repeat the above step for the Dotted Circle layer.
Select the Back Circle layer, sa-f-df, copy and paste bflies as new layer, selections invert and hit delete.
Add your elements I used the following:
Ballon Green, 30%
Branch 1 65%, duplicate image, mirror & flip.
Element 4 25%
Flower 1 50%
Add your copy right and text.
All done.
Sexy Girl

Sexy Girl
This tut assume your have a working knowledge of PSP.
Kit:Pink Persuassion by KnC Scraps you can find her kit at Lollipops N Gumdrops
Mask: Masks By Ginny, you can find it here
Fonts: Carpenter, it's a pay font
Shadow: 1,1, 36, 6
Filters: None
PSP Filters used: None
sa-f-df-nl= Select All, Float, Defloat, New Raster Layer.
sa-f-df= Select All, Float, Defloat.
c/p= copy & paste
See finished tag for placemnt of all elements.
Let's begin.
Open mask and tube.
Open a new image 600x600 flood fill with white.
c/p Element 7 resize to 70%.
C/P the Grass and resize 70%, move down slightly in your image.
C/p Element 1 resize 75%, move it down slightly so that it lies just over the Grass layer.
C/p Branch resize 75% 2 times move to the right, duplicate and mirror.
New layer, select all, c/p paper 4 into selections.
On the Mask By Ginny go to Adjust, Colour Balance, select negative Image.
C/P Ribbon 2 and resize 40%.
C/p your tube as a new layer add a 3,3,36,6 drop shadow.
Select your ribbon layer and duplicate move it above your tube layer and erase the part of the ribbon covering her left ankle.
Add a drop shadow 1,1,36,6 to the bottom ribbon.
C/P Pearls resize 40% and position to right of the mask layer.
C/P Tag and resize 20%, move to the left of your tag.
Add © and any text you like and you're done.
Thanks for trying my tut.
BST Forum
