Rebecca Sedwick Collab


 >
>


Sunday, November 27, 2011
New Xmas Stats


Santa Knows PTU
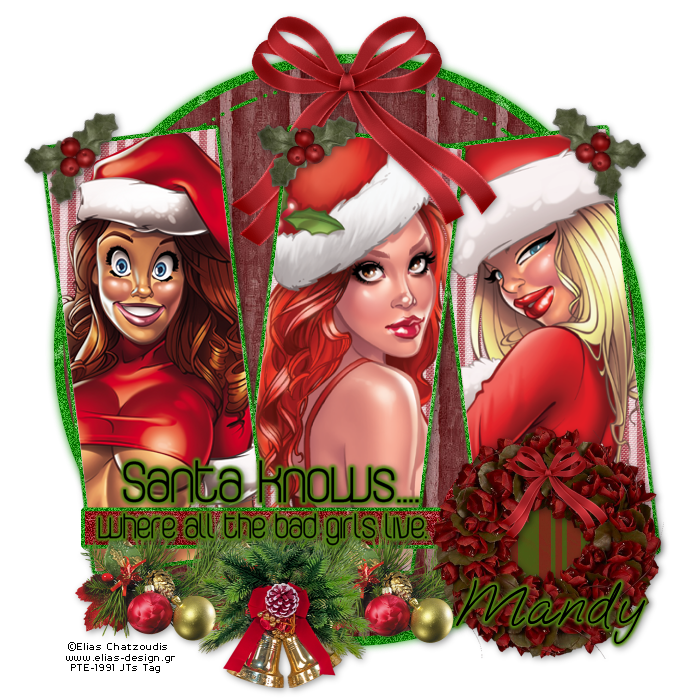
Santa Knows
This tut assumes your have a Good working knowledge of PSP.
Kit: A Beary Merry Christams by Diva's Designs you can purchase it here
Thanks Mandy for letting me use this gorgeous kit for this tut.
Tube: Elias Chatzoudis, I used different tubes, you can purchase here
Mask: None
Template: by DeesDesignsDepot you can download here
Fonts: of choice I used OoohBaby which is a Rob font.
Shadow: 2,2, 40, 10
Filters: DSB Bright Noise, EyeCandy 5 Gradient Glow
PSP Filters used: None
sa-f-df-nl= Select All, Float, Defloat, New Raster Layer.
sa-f-df= Select All, Float, Defloat.
c/p= copy & paste
sa=select all
sn=select none
See finished tag for placement of tube/elements.
Let's begin.
Open tube and template in psp, duplicate the template and close the original.
In the template delete the credits, Top Purple Circle and Top White Circle layers.
Select Large White Circle layer, sa-f-df-nl, c/p paper 8 into selections, sn, apply DSB Bright Noise settings 45-Mix, hide template layer.
Repeat the above step for the following layers, Dot N Dash, for all 3 purple rectangles and White Strip layer.
Duplicate Raster 1 Layer, on original Raster 1 layer go to Adjust Blur, Gaussian Blur, use 4 as your setting.
Select the Large Mauve Circle layer, sa-f-df-nl, c/p paper2 into selections, sn, hide template layer.
Select Purple Strip layer, sa-f-df-nl, c/p paper 7 into selections, sn, apply DSB Bright Noise same settings as before, hide template layer.
Repeat the above steps for Bottom Purple Circle layer.
Select the Mauve Left Rectangle layer, sa-f-df-nl, c/p paper 4 into selections, keep selected, c/p first tube as new layer, position, invert selections and hit delete, hide template layer.
Repeat these steps for each Mauve Rectangle using a different tube for each rectangle.
Select Bottom White Circle, sa-f-df-nl, c/p paper 9 into selections, sn, hide template layer.
Select Word Art layer, apply EyeCandy 5 Gradient Glow, I used the Subtle White Glow settings, set the Glow radius to 5, colour used #528713
Now for the elements, I used the following:
Bow 2 @ 40%, duplicate this layer and resize again 40% for over the wreath.
Wreath @ 35%
Bell Decoration @50%
Holly @ 15%
Add your copy right and text.
All done.
Saturday, November 19, 2011
Winters Chill PTU
 Click on pic for close up look!
After almost a year I've finally made a kit. Taggers are gonna love this one. It's choke full of awesome elements over 80 of them. Snowflakes, splatters, trails, ribbons, bows, trees the list goes on, lol, I couldn't fit everything into the preview. 24 amazing papers (no overlays used for these babies), 5 glitter sheets (not your regular glitter sheets either) and as a bonus (early Christams present I guess)I've included the 5 styles (PS only) that I creted used to create some of the elements with.
I know you'll love this kit.
Get it on sale at:
http://www.scrappetizing.com/store/
http://www.twilightscraps.com/
http://www.lollipopsngumdrops.net/store/
Sunday, November 13, 2011
Let It Snow FTU

Let it Snow
This tut assumes your have a Good working knowledge of PSP.
Kit: by Wicked Princess Scraps, All It's Glory you can download it here
Tube: Ismael Rac, you can purchase this tube here
Mask: MC_Mask19 by Melissa'z Creationz, you can download it here
Template: MC_ChristmasTemp4 by Melissa'z Creationz, you can download it here
Fonts: Santa's Sleigh, you can download here
Shadow: 2,2, 36, 6
Filters: DSB Noise, Penta Com Color Dot,
PSP Filters used: None
sa-f-df-nl= Select All, Float, Defloat, New Raster Layer.
sa-f-df= Select All, Float, Defloat.
c/p= copy & paste
sa=select all
sn=select none
See finished tag for placement of tube/elements.
Let's begin.
Open your tube, template, and mask in PSP. Duplicate the template and close the original.
Before I started I changed the colour of the outfit worn by the tube (this is allowed) go to Adjust, Colour Balance, Manual Colour Correction, Source colour=1C1C1, Target Colour=7B9C45. You can also use the green outfir already supplied in the tube.
In the template delete the Credits layer.
Select the bottom layer in the template add a new layer, move to the bottom and flood fill white.
Add a new layer, sa, c/p pp7 into selelctions, sn.
Apply your mask and merge group, aplly DSB Bright Noise use settings 37-Mix.
Open pp1, go to Image Rotate, Free Rotate 90° Right, in the template select Raster 3 layer, sa-f-df, c/p pp1 as new layer, selections invert hit delete, sn.
Select Copy of Raster 3 Layer in the template, sa-f-df, c/p pp1 as new layer Image Mirror, selections invert and hit delete, sn.
Select Raster4 layer, sa-f-df-nl, flood fill this area with colour # 603A27, sn, delete template layer, apply PentaCom Color Dot use Value=55 and Distance=5 rest of the settings use default.
Repeat the above step for Copy of Raster 4 layer.
Select Raster 2 layer, sa-f-df-nl, c/p pp6 into selections, sn.
Select Bottom Merged Layer, (white frame) add DSB Bright Noise setting at 45-Mix.
Select next Merged layer up, (red squares) sa-f-df-nl, flood fill with 603A27.
Select the 3rd merged layer from the top (black frames) sa-f-df-nl, flood fill with colour # 362116, sn, delete template layer, apply PentaCom Color Dot use Value=59 and Distance=2 rest of the settings use default.
Select the top Merged layer (text) sa-f-df-nl, flood fill each letter with colour # 362116, you may have to zoom in a bit, sn, delete template layer.
Select Raster 2 layer again, sa-f-df, c/p tube as new layer, position inside selection invert delete, you will have to erase anything showing in the bottom square, move to below the White frame layer, lower the opacity to 48 .
C/P your tube as a new layer, Image Mirror & position to the right.
Time to add your elements, I used the following:
Pinecone @ 50%
Ribbon Tree @ 50%
Ribbon @ 40%
WoodSnowman @ 40%
MouseCone @ 30%
Citrus @100%, c/p as new layer, erase all but the 2 on the far right
Add your copy right and name.
For my name I used colour 362116 in foreground and colour E3D5AD in th background, add a simple inner bevel using te following settings:
Shape # 4
Width=20
Smoothness=50
Depth=47
Ambience=13
Shininess=50
Angle=0
Intensity=30Elevation=60
Colour # CBAE69
All done, thanks for trying my tut.
Saturday, November 12, 2011
My First Tag Template

Gypsy Queen PTU

Gypsy Queen
This tut assumes your have a Good working knowledge of PSP.
Please remember to use license number when using a PTU tube.
Kit: Gypsy Queen by Baby Cakes Scraps you can purchase this gorgeous kit here
Tube: Rachel Anderson, you can purchase this tube at CDO
Mask: Vix_mask362 by Vix you can download here
Template: By Blissfully Beth you can download here, template packs are on the left of her page.
Fonts: Saginaw
Shadow: 2,2, 36, 6
Filters: DSB Bright Noise or a noise setting of your choice in PSP
PSP Filters used: Noise
sa-f-df-nl= Select All, Float, Defloat, New Raster Layer.
sa-f-df= Select All, Float, Defloat.
c/p= copy & paste
sa=select all
sn=select none
See finished tag for placement of tube/elements.
Let's begin.
Open your tube, mask and template in PSP, duplicate the template and close the original.
Delete the Credits & wordart layers.
Selectthe background layer and add a new layer, sa, c/p Cloudy paper into selections, sn, apply your mask and merge group.
Merge layers 1, 2, & 3
Sa-f-df, c/p Dark Blend Paper as new layer, invert selelctions and hit delete, delete the template layer.
Select Grey Rectangle Frame layer, sa-f-df, c/p Glitter Borader paper as new layer, selections invert, hit delete, keep selected.
C/P Raster 4 layer of your tube (if you're using the same tube), position to the left, hit delete. Add a dropshadow, lower the oppacity to 48.
C/PRaster 2 layer of your tube as a new layer, resize 80%, go to Sharpen, Unsharpen Mask, use these setting: Radius 1, Strength 35, clipping 4.
Add a drop shadow.
Select the Black Frame layer, sa-f-df-nl, c/p Glitter Paper into selelctions, sn.
Now to add your elements, I used the following:
Deep Purple Bow @ 40%, use your deform tool to push the ends of the ribbon to line up with the edge of the frame. Duplicate image and merge down.
Glittery Flower @ 40 %
Purple Lace @ 50% use the deform tool to push in the edges of the lace.
Golden Leaves @ 25%
Glitter Butterfly @ 25%
Lavender Flower @ 35%
Add your copy right and text.
All done.
Sunday, November 6, 2011
My Blue Christmas PTU

My Blue Christmas
This tut assumes your have a Good working knowledge of PSP.
Kit: My Blue Christmas by CuddleBees Designs you can purchase this kit at LollipopsNGumdrops.
This is a full sized kit so papers will have to be resized before using them.
Resize your papers to 800x800 pixels, elements should be resized 35% and sharpened once before following each step that involves an element from the kit.
Tube: Elias Chatzoudis pte-1663, you can purchase here
Mask: HorsePlay's Pasture Mask 19, you can download it here.
Template: by Designs by Vaybs, Vaybs_MisfitXmas5 you can download here near bottom of page.
Fonts: JellyK Delicious Cakes you can download here
Shadow: 2,2, 36, 6
Filters:
PSP Filters used: Noise filter
sa-f-df-nl= Select All, Float, Defloat, New Raster Layer.
sa-f-df= Select All, Float, Defloat.
c/p= copy & paste
sa=select all
sn=select none
See finished tag for placement of tube/elements.
Let's begin.
Open your tube, mask & template, duplicate the template and delete the credits & wordart layers.
Select the background layer and add a new layer, sa, (resize paper 800x800 pixels and sharpen once) c/p paper 6 into selections, sn, apply your mask and merge group.
Select Raster 1 layer, sa-f-df-nl, open paper 13 resize to 800x800 pixels, sharpen, c/p into selection on your new image, sn, add your favourite noise filter settings, I used Gaussian, Monochrome setting it at 45.
Open paper 10, resize 800x800 pixels.
In your template select Raster 2, go to Adjust, Hue & Saturation, settings at 0, sa-f-df, selections modify contract by 8.
Add a new layer, c/p paper 10 into selections, sn.
Repeat the above steps for the Raster 4 layer using paper 10.
Repeat again for rasters 3 and 5 using paper 7, remember to resize paper 7 first.
Select Raster 7, go to Adjust, Hue & Saturation settings at 0.
Select Raster 6, sa-f-df, c/p paper 10 as new layer, selections invert and hit delete, sn, hide your template layer for now.
Select Raster 8, sa-f-df-nl, c/p paper 8 into selections, sn.
Select Raster 9, go to Adjust, Hue & Saturation, settings at 0.
Select Raster 10, go to Adjust, Hue & Saturation, settings at 0.
While still in Raster 10, sa-f-df, selections modify contract by 8, add a new layer, c/p paper 10 into selections, sn.
Ok now you're ready to add your tube.
Select Raster 6 layer, sa-f-df, c/p the close up of your tube as a new layer, selections invert and hit delete, lower the opacity to 50.
C/P your tube as a new layer, positon.
Time to add your elements, I used the following:
Hanging Ornament @35% x2
Flower1 @35% x2
White Branch @ 35% x2, duplicate and mirror image.
Flower2 2 35% and then 50%
Add your copy right and text.
All done.
A Time To Remember PTU

A Time To Remember
This tut assumes your have a Good working knowledge of PSP.
Kit: Gemini Scraps, A Time To Remember, you can purchase this kit here
This is an absolutely stunning kit, a joy to work with, thank you Vicki
Tube: Anna Liwanag, you can purchase her tubes at PTE
Mask:Wee Scot Lass,WSL_Mask81, you can download here
Template:None
Fonts: JellyK Delicious Cakes you can download here
Shadow: 2,2, 36, 6
Filters: None
PSP Filters used: None
sa-f-df-nl= Select All, Float, Defloat, New Raster Layer.
sa-f-df= Select All, Float, Defloat.
c/p= copy & paste
sa=select all
sn=select none
See finished tag for placement of tube/elements.
Let's begin.
Open a new image 600x600 flood fill white.
Add a new layer, sa, c/p paper 02 into selelctons, sn.
Apply your mask and merge group.
C/P Frame 6 as new layer, resize 85%.
Using Magic Wand click inside Frame, selections modify, expand by 3 pixels.
C/P GreeneryPink1 as new layer, hit delete.
Move this layer below your Frame in the layers pallete, add a drop shadow.
Hi-lite Mask layer.
C/P Butterfly Cluster resize 60%, duplicate this layer, go to Image Mirror, layers merge down.
Using Magic Wand click inside Frame, selections modify, expand by 3 pixels, hit delete, sn.
Duplicate this layer and Image Flip, merge these 2 layers down, add a drop shadow.
Using Magic Wand click inside Frame, selections modify, expand by 3 pixels, c/p Clock as new layer position to the right, selections invert hit delete, lower the opacity to 38, sn, move this layer below the frame layer.
Using Magic Wand click inside Frame, selections modify, expand by 3 pixels, c/p close up of tube as new layer, selections invert hit delete, move this layer below the frame layer.
Add any other elements you wish, I used the following:
Folded Ribbon, use your deform tool to rotate to your liking.
KeyString @ 35%
Fabric Flower 04 @ 50%
Stitches, use your erasor tool, brush size 24 to erase the edges you don't want.
Bow 01 @ 50%, use your deform tool the rotate to your liking.
Fabric Flower 03 @20%
Add your copy right and text.
All done.
One Of A Kind PTU

One of a kind
This tut assumes your have a Good working knowledge of PSP.
Kit: By Tammy, TLP Designz, TLP_Blue Dreams, you can purchase this kit here.
You can visit Tammy's blog here
Tube: Olivia, you can purchase this tube at Creative Designs Outet.
Mask:HorsePlay's Pastre Mask 27 you can download here
Template:Missy_tagtemplate281 at Divine Intentionz, you can download here templates are listed on the left side of her page.
Fonts: Halida you can get it here
Shadow: 2,2, 36, 6
Filters: DSB Bright Noise
PSP Filters used: None
sa-f-df-nl= Select All, Float, Defloat, New Raster Layer.
sa-f-df= Select All, Float, Defloat.
c/p= copy & paste
sa=select all
sn=select none
See finished tag for placement of tube/elements.
Let's begin.
Open tube, mask and template in PSP.
Duplicate the template and close the original, delete the credits and shape layer.
Increase canvas size to 700x600. You can resize later.
Click on background layer flood fill blank area with white.
Add a new layer, sa, c/p paper 1 into selections, sn, apply your mask and merge group.
Select Glittered Oval layer, sa-f-df-nl, c/p paper 7 into selections, sn, apply DSB Bright Noise, setting 49-Mix, delete template layer.
Select Oval layer, sa-f-df, c/p paper 10 into as new layer, selections invert hit delete, sn, delete template layer.
Select Circle layer, sa-f-df-nl, c/p paper 10 into selections, sn, delete template layer.
Select Wordart layer, go to Adjust, Hue & Saturation settings at 0, go to Adjust, Colour Balance, Manual Color Correction, Source Color=0C0C0C, Target color=2A726C.
Repeat these steps for the Star 2 layer.
Add your elements, I used the following:
Fan @ 65%
Flower @40%
Bugs @30%
Folden ribbon @ 50%
Butterfly @30%
Bow @ 30% x2
Button @30%
Add your copy right and text.
All done.
Subscribe to:
Posts
(Atom)
BST Forum
