Rebecca Sedwick Collab


 >
>


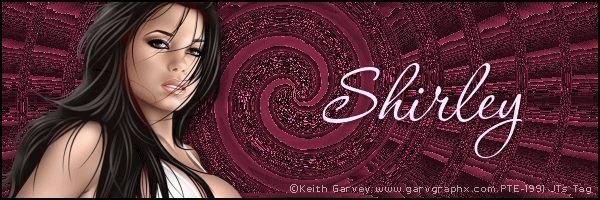
Sprial

Spiral
This tut was created by JTsDesigns. Any similarities to other tuts are coincidental.
Filters used in this tut: Krusty Vol.1 Generator B-1.
Tube by Keith Garvey available here.
Open a new image 600x600.
Apply Krusty Vol. 1 Generator B-1, change the Green% setting to 66.
Go to Effects, Edge Effects, Enhance.
Open a new image 600x250, select all, c/p the 600x600 image into selections, name this layer Back1.
Copy & paste your tube as a new layer and position to the left.
Add a new layer and flood fill with black, selections all, contract by 2 pixels hit delete.
Add your text and copy right.
Hide your Back 1 layer and Merge Visible.
You should now have only 2 layers.
Hide your tube layer, c/p the Back1 layer into Animation Shop (AS) as a new animation.
Edit paste as new animation again so that you have 2 copies of the Back1 image open.
Activate one of the Back1 Images and duplicate the frames so that you have 10 frames, minimize for now.
In the other Back1 images go to Effects, Insert Image Effect, from the drop down menu select Spiral.
Click on Customize and type in 5116 as the Maximum Angle, and Canvas Colour (black) is selected.
Click ok in the windows.
You should now have 13 frames.
Click on Frame # 4, hold down your shift key and click on frame #13, you should now have 10 frames hi-lited.
Go Edit, Copy.
Activate the other Back1 frame.
Go to Edit, Propogate Paste,
Edit, Select All,
Edit, Paste Into Selected Frame.
It's important that you do not move your mouse, just simply left click and it will center in your image.
This is your new animation, now lets get the tube layer to add on top.
Back to PSP.
Hide your Back1 layer, unhide your tube layer and select that layer, copy and paste as new animation in AS.
Duplicate this frame so that you have a total of 10 frames.
Go Edit, Select All
Edit, Copy.
Activate the New animation.
Go to Edit, Propogate Paste,
Edit, Select All,
Edit, Paste Into Selected Frame.
Hover the image over the first frame slightly to center the frame as it is a little smaller than the the Back1 frames for some reason, once satisfied with it's position left click once.
All done, save as a gif.
On The Veranda PTU

On The Veranda
This tut assumes your have a Good working knowledge of PSP.
Kit: On The Veranda by Butterfly Kisses Scraps you can purchase here
Tube: Barbara Jensen you can purchase this tube here
Mask: by me, JTsDesigns, you can get it here
Template: MC_Template33 from Melissa's Creationz you can download it here
Fonts: Saginaw
Shadow: 2,2, 36, 6
Filters: None
PSP Filters used: Gaussian Blur
sa-f-df-nl= Select All, Float, Defloat, New Raster Layer.
sa-f-df= Select All, Float, Defloat.
c/p= copy & paste
sa=select all
sn=select none
See finished tag for placement of tube/elements.
Let's begin.
I recoloured the tubes outfit to co-ordinate with the kit, this is allowed with this tube.
Open your tube, mask and template in PSP, duplicate the template and close the original.
In you template delete the following; credits, shapes and "perfect 10" layers.
Image canvas size 600x600 Center.
Unhide the Raster 1 layer and flood fill white, add a new layer, sa, c/p paper 2 into seletions, sn, duplicate this layer, on orginal layer go to Adjust, Gaussian Blur setting 38.61, resize this layer 95%
Select Large Circle layer, sa-f-df-nl, c/p paper 14 into selection, sn, delete the template layer.
Repeat the above step for the Rectangle Frame layer.
Select the Sm Circle layer, sa-f-df-nl, c/p paper 15 into selection, sn, delete the template layer.
Select the Double Squares layer, sa-f-df, c/p paper 2 as new layer, selections invert and hit delete.
Select the Rectangle Background layer, sa-f-df, c/p paper 6 as a new layer, selections invert and hit delete, keep selected.
C/P your tube as a new layer, position to the left, hit delete. Add a drop shadow, change the Blend Mode to Luminance Legacy.
C/P your tube again and move to the right, add a drop shadow.
You can now add your elements, I used the following:
Sparkle02 @ 100%
Ribbon01 @ 65%
Spill01 @ 45% then 65%
Ribbon03 65% then 65%
Flower02 @ 25%
Butterfly01 @ 20%
Add your copy right and text.
All done.
Punk Rock Fun PTU

Punk Rock Fun!
This tut assumes your have a Good working knowledge of PSP.
Kit: Punk Rock Fun by AmyMarie you can purchase her kits here
Tube: VeryMany, EMOlution5, you can purchase here
Mask:WSL_Mask 81 which you can download here
Template: None
Fonts: P22 Corinthia, it's a pay font but any nice script font will do.
Shadow: 2,2, 36, 6
Filters:
PSP Filters used:
sa-f-df-nl= Select All, Float, Defloat, New Raster Layer.
sa-f-df= Select All, Float, Defloat.
c/p= copy & paste
sa=select all
sn=select none
See finished tag for placement of tube/elements.
Let's begin.
Open a new image 600x600 flood fill white.
Add a new layer, sa, c/p paper 11 into selelctions, sn, apply your mask and merge group.
C/P Glitter Splatter 2 as new layer, resize 90%, move down on your image,
C/P Glitter Splatter 3 as new layer.
C/P Wireframe 1 as new layer resize 80%.
C/P the Glass Star Chain as a new layer, use magic wand click inside Wire frame, selection invert, on the star chain layer hit delete, sn, move this layer to just above the mask layer.
C/P your tube as a new layer.
Select your Frame layer and duplicate, move this above your tube layer in your layers pallet.
Use your erasor tool to erase top part of the frame that covers the head, select your tube layer and delete anything that is showing below the bottom of the frame.
Add a drop shaow to your tube and bottom frame layer.
Now to add your elements, I used the following:
Color Guitar 2 @ 80%
Devil Heart 2 @ 75%
Glass Star 1 @ 50%
Glass Brad 6 @ 12%
Add your copy right and text.
I added a gradient glow and shadow to my name but that's optional.
All done.
Hocus Pocus Life's A Witch PTU

Hocus Pocus Life's a Witch
This tut assumes your have a Good working knowledge of PSP.
Kit: Hocus Pocus by Le Paradis Du Scrap which you can purchase here.
Tube: Elias Chatzoudis which you can purchase here
Mask:Vix_Halloween2010No1 you can download this pack here
Template: by BlissfullyBeth, this is template pack101-110 ( packs are lised on the left of her blog) a great set of halloween templates you can get them here
Fonts:Jellyk Delicious Cakes you can download it here
Shadow: 2,2, 36, 6
Filters: DSB Bright Noise,
PSP Filters used: Noise,
sa-f-df-nl= Select All, Float, Defloat, New Raster Layer.
sa-f-df= Select All, Float, Defloat.
c/p= copy & paste
sa=select all
sn=select none
See finished tag for placement of tube/elements.
Let's begin.
Open the, mask and template in psp, duplicate the template and close the original.
In the template delete the credits and the Grey Rect Frame layers.
Starting at the bottom select the Raster 1 layer, add a new layer flood fill white, delete the Raster 1 layer.
Add a new layer, sa, c/p paper 11 as a new layer, apply your mask and merge group.
C/P E13 (eyes from the elements folder) as a new layer.
Select the Dotted Oval layer, sa-f-df-nl, c/p paper 2 into selelctions, sn, delete the template layer, apply DSB Bright Noise45-Mix or use your favourite noise settings in PSP.
Open paper 5 and make into your foreground pattern setting the Repeats at 0 and the scale at 10, select the Vert Black Line 2, sa-f-df, flood fill with the pattern, sn.
Repeat this step for the Vert Balck Line 1 layer.
Select the Orange Oval layer, sa-f-df-nl, c/p paper12 into slelctions, sn, delete the template layer.
Select the Black Half Circle layer, sa-f-df c/p paper 13 as a new layer, selelctions invert, hit delete, keep selected.
C/p your tube (layer 2 if you're using the same tube) as a new layer position over the half circle and hit delete, sn.
C/P the same tube again and place directly over the first tube, use your erasor to erase any overlap that you don't want showing.
Give this layer a deep drop shadow, I used 4, 4, 36,6 make sure "Shadow On New Layer" is checked.
Apply the same shadow on the New shadow layer and the again on the next shadow layer this will give the appearance of her popping out.
This is for the benefit of those of us out there that don't have Loka's Shadow lab lol.
I applied DSB Bright Noise to the "and then you fly" and Witch Orange layers.
Now for the elements, I used the following:
E1 @ 80%
E13 @ 8%
E15 @ 20%
E34, copy and paste as a new layer, use your erasor to erase overlap, set your erasor hardness to 0, use the mask layer as your guide.
Once your happy with the results grey scale the moon and lower the opacity to 94.
E9 @ 20%
E44 @ 20%
Add your copy right and text.
All done.
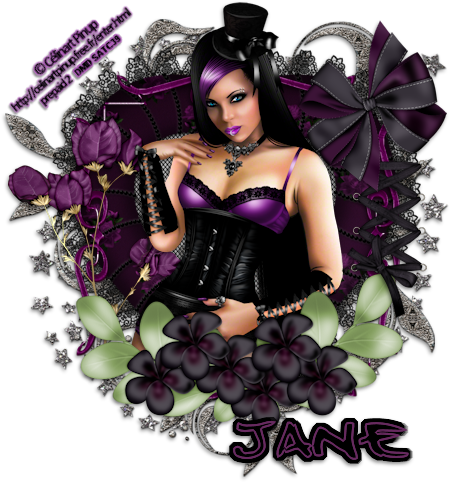
Devilish Tease PTU

Devilish Tease
This tut assumes your have a Good working knowledge of PSP.
Kit: Devilish Tease by Angels Designz, you can purchase her kit here
Tube: Keith Garvey, you can purchase his tube here
Mask: by Horseplay's Pasture, mask 19, you can download from here
Template: by Horseplay's Pasture, template 131, you can download from here
Fonts: Quastic Kaps Line you can download it here
Shadow: 2,2, 36, 6
Filters: Xero, Porcelain (optional)
PSP Filters used: None
sa-f-df-nl= Select All, Float, Defloat, New Raster Layer.
sa-f-df= Select All, Float, Defloat.
c/p= copy & paste
sa=select all
sn=select none
See finished tag for placement of tube/elements.
Let's begin.
Open your tube/s, mask and template, duplicate the template and close the original.
In the template delete the following; Credit & Strip layers.
Select the back ground layer, add a new layer, sa, c/p paper 11 into selections, sn.
Apply your mask and merge group.
Select Circle 1 layer, sa-f-df, c/p paper 3 as new layer, selections invert, hit delete. Delete template layer.
Repeat this step for Circle 2 layer.
Select Back Right Rectangle, sa-f-df-nl, c/p paper 1 into selelctions,sn, delelte teplate layer.
Repeat this step for Back Left Rectangle layer.
Select Oval Back layer, sa-f-df, c/p paper 11 as new layer, selections invert, hit delete.
Select Oval layer, sa-f-df, c/p paper 4 as new layer, selections invert, hit delete, keep selelcted.
C/P close up of tube as new layer, hit delete, sn.
Select the Top Rectangle, sa-f-df, c/p paper 9 as new layer, selection invert, hit delete, keep selections, c/p paper 5 as new layer, hit delete, keep selected, invert selelctions, modify, contract by 4 pixels, hit delete, sn.
Select the Top Rectangle, sa-f-df, c/p tube as new layer position, selelctions invert hit delete, apply Xero Porcelain filter using only the Red Channel set at 255 the others at 0.
Repeat the above steps for the Bottom rectangle.
C/P your tube as new layer.
You can now add the elements, I used the following:
Mask @ 50%
Razor @ 30%
Lips @ 30% then again @ 50%
Devil Heart @ 50%
Heart Chain @ 100%
Feather @ 80%, position to the left, duplicate and mirror.
Add your copy right and text.
All done.
Awesome tag!!
Sweet Connection PTU

Sweet Connection
This tut assumes your have a Good working knowledge of PSP.
This is the first of many tuts working as CT for Gemini Creationz.
Kit: Sweet Connection by Gemini Creatioz you ca purchase her kit here
She's having a 40% off sale for the month of October!
Mask: Bev Herr Mask 20 you can download here
Template:Crazy Sexy Cool by Crazy Cakes Scraps you can download it here
Fonts: Respective, which you can get here
Shadow: 2,2, 36, 6
Filters: DSB, Bright Noise you can also use the noise filter in PSP
PSP Filters used: Noise
sa-f-df-nl= Select All, Float, Defloat, New Raster Layer.
sa-f-df= Select All, Float, Defloat.
c/p= copy & paste
sa=select all
sn=select none
See finished tag for placement of tube/elements.
Let's begin.
Open tube, template and mask in psp.
For the tube I recoloured some of the items (this is allowed) the colours I used were #712361 (purple) and 35557e (blue).
I greyscaled the items first the did manual colour correction in psp.
In your template delete the following: Vector 1 layer, text and Raster 4 layers.
Select Raster 2 layer, add a new layer and move it to the bottom of th layer pallet, flood fill white, just so that you ca see the effects as you add them to your tag.
Add a new layer, sa, C/P paste paper 16 into selections, sn, apply your mask and merge group.
Apply DSB Brght Noise filter setting 56_Mix.
Select raster 2 layer, sa-f-df-nl, C/P paste paper 16 into selections, sn.
Select Raster 3, sa-f-df-nl, c/p paper 5 into selelctions, sn.
Select Raster 1 layer, sa-f-df-nl, sa-f-df-nl, C/P paste paper 5 into selections, sn.
Select BOTTOM merge layer (there are 2 merged layers), sa-f-df-nl, c/p paper 12 into selections, sn.
Select TOP Merged layer, sa-f-df, c/p paper12 as a new layer, selelction invert and hit delete.
C/P your tube as new layer. Trim if needed.
Select the Top Merged layer again, sa-f-df, c/p your tube as a new layer and position over the selections, invert selection and hit delete.
Lower the opacity to 42%
Add your elements, I used the following:
Fancy Swirl2 @ 100%
Flower Scatter @ 85%
Greenery 2 @ 100%
Circle Flowers @ 100%
Plum @ 30%
Fabric Flower 2 @ 30% duplicate layer and position.
Fabric Flower @ 35%
Flower Scatter @ 100%
Shiny Streamer @ 100%
Add your copy right and text.
All done.
I now CT for........
 Woo Hoo!
Soul Catcher FTU Tubes & Kit

Soul Catcher
This tut assumes your have a Good working knowledge of PSP.
Kit: Goth This, by A Taggers Scrap you can download this awesome kit here
Tube: Anne Stokes 2 tubes for this tut, these are FTU tubes I downloaded them at
Mask:Vix-BigMask019 here, WSL_HalloweenMask1 here
Template: Missy_tagtemplate331
Fonts: P22 Corinthia (Rob font) sorry it's a pay font, or any simple script font will do.
Shadow: 2,2, 36, 6
Filters: None
PSP Filters used: None
sa-f-df-nl= Select All, Float, Defloat, New Raster Layer.
sa-f-df= Select All, Float, Defloat.
c/p= copy & paste
sa=select all
sn=select none
See finished tag for placement of tube/elements.
Let's begin.
Open your tubes and template and masks.
Duplicate the template and cloase the original. In the template delete the credits layer.
Select the background layer and add a new layer, c/p paper 3 as a new layer. Apply Vix mask (i cropped some of the black off first) merge group.
C/P the same paper as a new layer and apply the WSL mask, merge group and add a drop shadow.
Select Glitter Rectangle 1 Left layer, sa-f-df-nl, c/p paper 3 into selections, sn. Duplicate layer, image mirror.
Delete Glitter Rectangle 2 Right layer
Select Rectangle Center layer, sa-f-df, c/p paper 9 as new layer, selections invert, hit delete, sn.
Repeat above step for Circle Right and Circle Left layers.
Select Frame Back ground layer, sa-f-df-nl, c/p paper 2 into selections, sn.
C/P your tubes see finished tag for placement.
Add your elements I usd the following:
Glyph, use the deform tool to stretch it out fit in the circle.
Rose, I deleted the large leaf from the rose so that you could see the praying hands.
Wings
Wire @ 60%, rotate image 90
Add any text you like
Add your copy right and name.
All done.
StrawBerry Dreams PTU

Strawberry Dreams
This tut assumes your have a Good working knowledge of PSP.
Kit: Strawberry Dreams by Creative Scraps by Crys you can purchase this kit here
Tube: Elias Chatzudis you can purchase this tube here.
This is a limited additon tube if you purchase 4 tubes you get this one free,
offer open until October 31st.
Please do not use without a licence.
Mask:None
Template:Punky Butts, Template # 84, you can download this and lots of other templates here
Fonts: Respective, you can download here
Shadow: 2,2, 36, 6
Filters: DSB Bright Noise,
PSP Filters used: None
sa-f-df-nl= Select All, Float, Defloat, New Raster Layer.
sa-f-df= Select All, Float, Defloat.
c/p= copy & paste
sa=select all
sn=select none
See finished tag for placement of tube/elements.
Let's begin.
Open your tube and template, duplicate the template and close the original.
In your template delete the following layers, Credits, Middle Square, Film Strip Frame, Film Strip Backing and Middle Square Frame.
Starting from the bottom of the template select Left rame Circle layer, sa-f-df-nl, c/p paper 14 into selections,
sn, delete template layer, apply DSB Bright Noise setting 37-Mix, repeat the above steps for the remaining Circle frame layers.
Select Left Circle layer, sa-f-df-nl, c/p paper 18 into selctions, sn, duplicate this layer, Image Mirror and move it above the Right Circle layer in your layer pallet.
Select the Left Diamond Line Style layer, sa-f-df-nl, c/p paper 16 into selections,sn, delete template layer, add Bright noise filter again using the same settings as before.
Duplicate this layer, Image Mirror, delete the Right Diamond Line style layer.
Add a slight drop shadow to both of these layers, I used 1, 1, 35, 6.
Select the Center Cirlce, sa-f-df-nl, c/p paper 16 into selections, sn.
Select the Right Square Frame layer, sa-f-df-nl, c/p paper 16 into selelctions, sn, duplicate this layer Image Mirror.
Delete the Left Square Frame layer.
Select the Left Square layer, sa-f-df, c/p paper 18 as a new layer, move the paper so that the red part of the paper fills the selection, selections Invert, hit delete, selections invert again c/p close up of tube as new layer, position, Invert selections again and hit delete.
Change the blend mode to Hard Light.
Duplicate your tube layer and your new left square layer, Image mirror to both layers.
C/P tube I resized 90%, sharpen once.
Add your elements, I used the following:
Greenery,
Red Petals
Light @ 50%
Strawberries 50%
Doodle @ 35%
Add your copy right and text.
All done.
New Banner & Avatar!!


New banner and avatar.
Mask

Perfect Scare FTU
 This tag is dedicated to one of the greatest taggers out there.
Bev Herr, I just love her tags they are so hauntingly beautiful.
So I made this tag/tut emulating her style.
I hope you like it Bev.
Perfect Scare
This tut assumes your have a Good working knowledge of PSP.
Kit: The Perfect Scare, by Bev at HorsePlay's Pastures an absolutely gorgeous kit.
Thank you so much for your generosity xoxo
Tube: by Zindy, you can purchase this tube and others here
Mask: by me just click on the image and right click to save.
Template: by Punkybutts Template 96, you can download this template here.
Fonts: JellyKa Delicious Cake you can download here
Shadow: 2,2, 36, 6
Filters: None
PSP Filters used: None
sa-f-df-nl= Select All, Float, Defloat, New Raster Layer.
sa-f-df= Select All, Float, Defloat.
c/p= copy & paste
sa=select all
sn=select none
See finished tag for placement of tube/elements.
Let's begin.
Open your tube and template, duplicate the template and close the original.
In the template delete the first 13 layers.
Select the background layer flood fill white, sa, new layer, c/p paper2 into selections.
Deselect and apply your mask, merge group.
Select the Circle Dots layer, sa-f-df-nl, c/p paper8 into selections, sn, delete template layer.
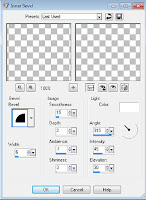
Repeat the above step for all the frame layers adding an Inner Bevel to each frame using these
settings:
Select the Square layer, sa-f-df-nl, c/p paper6 into selections, sn.
Select the Large Circle layer, sa-f-df, c/p paper 6 as new layer, move your paper to your liking,
selections invertand hit delete.
Select the Right Circle, sa-f-df, c/p paper 4 as a new layer, position paper, selections invert hit delete.
Repeat above step for Left circle.
Select Center Circle, sa-f-df-nl, c/p paper 4 into selections, sn.
Delete all the template layers.
Copy and paste your tube, I resized mine 80%.
Add your elements, I used the following:
Element 42, @ 80%
Element 28 @ 30%
Element 10 @ 80% X2, c/p position to the left, duplicate and mirror.
Element 19 @ 40% X2
Add your copy right and text.
For the text I used Black foreground and paper 10 as my background pattern.
All done.
Suhweet!! FTU

Suhweeet!
This tut assumes your have a Good working knowledge of PSP.
Kit: Candy Treats by Kittz Kreationz she has some awesome freebies!
Direct link to kit page here
This special is only available until October 31st, 2011
Mask:None
Template:Pbs-Template136 which you can get here
Fonts:Aquarelle you can get if here
Shadow: 2, 2, 36, 6
Filters: Noise filter of choice. Xero Porcelain
PSP Filters used: Add & Remove Noise filter
sa-f-df-nl= Select All, Float, Defloat, New Raster Layer.
sa-f-df= Select All, Float, Defloat.
c/p= copy & paste
sa=select all
sn=select none
See finished tag for placement of tubes and elements.
Let's begin.
Open you tube and template.
Flood fill the background layer with white so you can see what your doing, you can delete this layer at the end.
Select square bottom layer, sa-f-df-nl, c/p paper 8 into selections, sn, delete template layer.
Repeat above step for square top, and square rotate right layers.
For all the frame layers apply your fav noise filter, I used DSB Bright Noise set @ 34 Mix, for those without DBS you can use the Adjust, Add Noise filter in PSP
Use your magic wand to select the Right Circle layer, c/p paper 3 into selection, sn.
Repeat above step for the Left Circle layer and keep selected for next step.
If you are using the same tube c/p layer1 (or close up of tube) as a new layer position,
C/P the Candy wordart, c/p Layer1 of your tube and resize 75%, Adjust Sharpen once.
Add your elements, you can use my finished tag as a reference but there are so many terrific elements in this kit you may feel like adding less or more, this part I leave up to you.
For the text I used Paper2 as my background pattern and white in the foreground,
Add your copy right.
All done.
Spooktacular FTU

Spooktacular!
This tut assumes your have a Good working knowledge of PSP.
Kit: Monster Ball VIP Room, by Digicats, you can download it here
Tube: Elias Chatzoudis, pte4172, Pumpkinella you can purchase from here
Mask:Vix_Halloween2010No1, you can download from here
Template:Missy_tagtemplate288, you can download here
Fonts:LD Jilly Nilly, you can download here.
Shadow: 2, 2, 36, 6
Filters: DSB, Bright Noise or your favourite noise setting in PSP, Pentacom, Jeans
PSP Filters used: Noise
sa-f-df-nl= Select All, Float, Defloat, New Raster Layer.
sa-f-df= Select All, Float, Defloat.
c/p= copy & paste
sa=select all
sn=select none
Let's begin.
Open your tube and template.
In your template delete the first 5 layers and the Glittered rectangle layer.
Increase your canvas size to 650x650, flood fill the background layer with white so you can see what you're doing.
Add a new layer and flood fill black, apply your mask and merge group.
Select your square layer, click once with magic wand. c/p paper04 into selections, sn.
Apply Pentacom Jeans using these settings, Amount 58, Borderwidth 2, Interval 2.
Select Glittered Oval1 layer, sa-f-df-nl, c/p paper02 into selelctions,sn, delete template layer.
Apply DSB Bright Noise, setting 43, Mix or your favourite PSP noise setting will do.
Repeat these steps for the Glitter Frame Layer.
Select Oval layer, click once with magic wand add a new layer and flood fill with gradient use
884879 Foreground & DF9669 Background colours set at 45 degrees, apply Pentacom, Jeans using these settings, Amount 58, Borderwidth 2, Interval 2.
Select the Circle layer, click with your magic wand add a new layer and flood fill with your gradient but with the angle set at 224.
Keep selected.
Change to Blend mode to Overlay.
Select the Frame background layer, click once with magic wand, c/p paper2 as a new layer, selections invert and hit delete.
Selections Invert again. C/P your 2nd Tube layer as a new layer,
Add your elements, you can use my tag as a guide.
Add your copy right and text.
All done.
WitchyPoo FTU

Halloween
This tut assume your have a Good working knowledge of PSP.
Kit: None
Tube: Keith Garvey, you can purchase his tubes here.
Mask:Vix_Halloween2010No1, Mask Set 1 on Vix's blog you can find here.
Template:None
Cluster Frame:from Dessi Designs Depot.
Fonts:Gorestep, you can find here
Shadow: 3,3, 36, 6
Filters: None
PSP Filters used: None
sa-f-df-nl= Select All, Float, Defloat, New Raster Layer.
sa-f-df= Select All, Float, Defloat.
c/p= copy & paste
sa=select all
sn=select none
Let's begin.
Open your template delete the credits,bg1 &bg2 layers.
Click on background layer and add another layer, flood fill with black.
Apply your mask and merge group.
Using magic wand click inside the top frame, modify your selections, expand by 7, c/p 1 tube as new layer.
Position tube and invert selections and hit delete.
Movethe frame layer up above your tube layer in the layer pallet.
Repeat this step with the other frame using another tube.
C/P your last tube and position.
Add your copy right and text.
All done.
BST Forum
