Rebecca Sedwick Collab


 >
>


New in Stores today

Blue For You Tagger kit

http://www.scrappetizing.com/
http://
Gothic Treasures PTU

Thank you for allowing me to use this amazing kit.
Tube: By Barbara Jensen, this is a bonus tube and may not be available
but Barb has so many wonderful tubes that could be used to create a similar looking tag.
You can purchase Barbs tubes here.
Template: by Missy, template 412, you can get it here.
Mask: by Vix, mask 404, you can download here.
Font: Zombie Holocaust, download here.
F=Float
DF=Defloat
SN=Select None
NL=New layer
C/P=Copy & Paste
Drop shadow=3,3,35,5
Repeat this step for the right square layer.
and again using your erasor tool erase the bottom part of the tube that is showing below the frame, add a drop shadow to your tube layer.
C/P element 41 as new layer above the green rectangle layer, resize 85% add a drop shadow.
C/P element 08 as new layer position, and add a drop shadow.
Open element 47, rotate all layers 90 right, c/p as a new layer, resize 65%, move to the right, duplicate layer and mirror.
C/P element 20, resize 45%, position.
C/P element 06, resize 45% position.
C/P element 29, resize 35% position.
C/P element 01, resize 35% position.
C/P element 51, resize 40% position.
Tropical Paradise PTU

This tut assumes you have good working knowledge of PSP.
Kit: Tropical Paradise, by Applehead Designs you can purchase this kit here.
Thank you Applehead for allowing me to use your wonderful kit.
Tube: Green Mermaid by Elias Chatzoudis, you can purchase this tube here.
Template: by AquaRebel, template # 71, download here.
Mask: by Vix, Vix Big Mask 001, you can down load here.
Font: Puppypoopy, download here.
SA=Select All
F=Float
DF=Defloat
SN=Select None
NL=New layer
C/P=Copy & Paste
Drop shadow=3,3,35,5
In the template delete the following layers, layer 10,9 8, 7, 6.
Resize your mask layer 95%.
Select raster 5 layer, sa,f,df,nl, flood fill with your new gradient, sn, got effects, texture effects. weave, use the following settings, Gap size=1, width=3, opacity=4, weave colour =black, gap colour=white, fill gaps is checked, delete the template layer.
C/P Seashell 02 as new layer, resize 35%, position bottom right of image.
C/P Seashell 03 as new layer, resize 35%, position bottom right of image.
Vintage Time PTU

This tut assumes you have a good working knowledge of psp, this was done in version 9.
Kit by ADDesign, you can purchase this kit here.
Thank you so much for allowing me to use your kit for this tutorial.
Template: by Divine Intentionz, Template # 343
Mask: by Vix, Mask 362, the one at the top, just right click and save here.
Tube: by Alex Prihodko, at www.picsfordesign.com
SA=Select All
F=Float
DF=Defloat
SN=Select None
NL=New layer
C/P=Copy & Paste
Drop shadow=3,3,35,5
Open the template, duplicate and close the original.
Delete the following layers in your template, credits, wordart, and rectangle 1 & 2.
In the template, go to Canvas and resize to 700x700, on the background layer flood fill with white.
Add a new layer, sa, open paper pp03, don't forget to resize, c/p into selections, sn.
Layers merge down, use your erasor tool to erase the 2 brown dots one at the top and one at the bottom that are sticking out on their own.
Repeat the above step for the Frame layer, when done delete the template layer.
Add a drop shadow to each these layers.
Make sure the new frame background layer you just made is selected in the layers pallet, sa,f,df,nl, c/p your tube as a new layer and position her head inside the marqee, selections invert, hit delete. sn, add a drop shadow and change the blend mode to Overlay.
Repeat this step for circle layer 2. Add a drop shadow to both layers.
Open el06, resize 35%, and again 50%, sharpen, c/p as new layer and position, duplicate and use your deform tool to change the angle.
Open el05 resize 35% and again 50%, sharpen, c/p as a new layer and position.
Open el02, resize 35% 2 TIMES, c/p as a new layer and position.
Open el01, resize 35% 2 TIMES, c/p as a new layer and position.
I resized my tag 80% and sharpened once before adding text & ©.
Mermaid

plugins:
Xero Fratillary http://www.xero-graphics.co.uk/freeware.htm
EyeCandy4000, Gradient Glow.
Xenofex 2 Constellation
PSP plugins, Edge Effects, Texture, Drop Shadow, Inner Bevel.
Foreground Colour: 32C3D2
Background Colour: F48734
Open new image 600x250, flood fill with gradient using the fg & bg colours. Angle 0, repeats 0.
Apply Xero Fratillary filter, Granulation 5, Agression 37, Tessalation 100, Variation 51.
Effects, Edge Effects, Enhance.
Custome Selections, Left 0, Top 75, Right 600, Bottom 175, Promote selection to layer.
EyeCandy4000 Gradient Glow, Select "Thin Green Line", in the Bsaics tab Glow Width 24, Soft
Corners 30, Opacity 100, In the color tab select the blue (32c3d2).
Add a drop shadow 0,0,50,0.
Custom selections, same as before, add a new layer and flood fill with the blue, select none.
Effects, Texture Effects, Weave use these settings:
Gap 1
Width 13
Opacity 2
Weave Color Black
Gap Color the orange (f48784)
Custome selections same as before, c/p tube, position to the Right, selections invert and delete.
Add a drop shadow 1,1,50,10, custome selections same as before, invert and delete.
Image Mirror, change the blend mode to Luminance Legacy.
C/P tube again as new layer, resize 50%, position and add a drop shadow 1,1,50,10.
C/P Blue fish resize 50% position and add the same drop shadow.
C/P Orange fish, resize 35% position and add the same drop shadow.
Add a new layer flood fill with the same gradient but change the Angle to 180.
Select all, modify contract by 3, hit delete, add drop shadow.
Hide your background layer and merge visible.
Add your © and name, I used Saginaw font with an Inner Bevel, use these settings:
Bevel Shape 2
Width 15
Smooth 0
Depth 6
Ambience -3
Shininess 0
Color White
Angle 315
Intensity 50
Elevation 30
Add a drop shadow, and apply the bevel again.
ANIMATION
Duplicate your background layer, twice so that you have 3 total.
On first background layer apply Xenofex2 Constellation, use default but check "Keep Original
Image"
Select 2nd background layer, apply constellation but hit the "Random Seed" button once.
Repeat this for the 3rd background layer. Hide 2nd and 3rd background layers.
Edit Copy Merged.
Open Animation Shop, Edit Paste as new animation, in PSP hide the 1st background layer unhide
the 2nd and copy merged, in AS Edit Paste after Current Frame, repeat this step for 3rd
background layer. View your animation and save as a GIF.
Thanks for trying my tut.
Autumn In The Park

Naughty Hottie

Tube name and store: Elias Chatzoudis, Leather Beauty, availabe here
Scrap kit: Naughty Hottie by Sarah's Tags N Things your can purchase it here.
Thank you Sarah for letting me use this very cute kit!! Visit her blog here.
Templates: Paint Shop Pro Goddess by Cakes, http://crazycakesscraps.blogspot.com
Masks: Mask 18 by Bev, download at http://horseplayspasture.blogspot.com
Font: Chrome Yellow NF
This turorial is the sole property of JTsDesigns.
Any similarities other tuts out the on the web is purly coincidental.
Add drop shadow using your favourite settings.
This tut uses no outside filters/plugins.
S=Selections, SA=Select All, F=Float, DF=Defloat, SN=select none, c/p=copy & paste.
First let's open all our supplies/templates/masks and tube, I like to have everything open and
ready. Duplicate the template and close the original.
You can refer to my finished tag for placement of elements.
Lets begin.
In the template delete the first 3 layers. Resize all layers 80%.
Select the bottom layer and add a new layer, flood fill white you can delete later, move to the bottom.
Add a new layer, S, SA. c/p ST-Paper4 into selections, SN.
Apply the mask layer, merge group.
Select layer 10, S, SA, F, DF, c/p ST-Paper1 as a new layer, selections invert and delete, repeat this step for layer 4 in the template.
Delete layer 10 & 4, add a drop shadow to both new layers.
Select layer 9, S, SA, F, DF, c/p ST-Paper4 as a new layer, move the paper to the right, selections invert and delete, SN.
Delete layer 9, add drop shadow. Repaet this step for layer 8.
Select layer 7, S, SA, F, DF, add a new layer, c/p ST-Paper10 Into Selections, move the paper to the left, selections invert and delete, SN. Add a drop shadow. Repeat this step on layer 3. delete layers 7 & 3.
From the elements c/p ST-City as a new layer, add a drop shadow.
Select layer 6, S, SA, F, DF, c/p ST-Paper3 as a new layer, selections invert and delete, SN. Go to Adjust, Noise, settings: Uniform and Monochrome selected setting 75. Add a drop shadow.
Repeat this step on layer 1. Delete layer 6 & 1.
Lets add our tube, select layer 2, S, SA, F, DF, c/p the close up and position over the selection, invert and delete.
Grey scale the tube layer (desaturate) and lower the opacity to about 66%.
c/p the smaller tube as a new layer, position the right add a drop shadow.
Now lets add the elements, I used the following elements:
ST-Boa @ 60%, rotate to lay across the bottom.
ST-Lips @25%
ST-Bottle @50%
ST-Polish @25%
ST-Lipstick @25%, Free rotate 90 Left.
ST-Condom @30% rotate to the right using deform tool, move to the right and below the main tube layer.
ST-Flower @75%
Add your text and © and your all done.
Thanks for trying my tut.
Evergreen Christmas PTU
 Evergreen Christmas
This tut assumes your have a Good working knowledge of PSP.
Kit: Evergreen Christmas by me you can purchase my kit at any one of my stores or you an buy directly here for .99 cents.
Santa Knows PTU
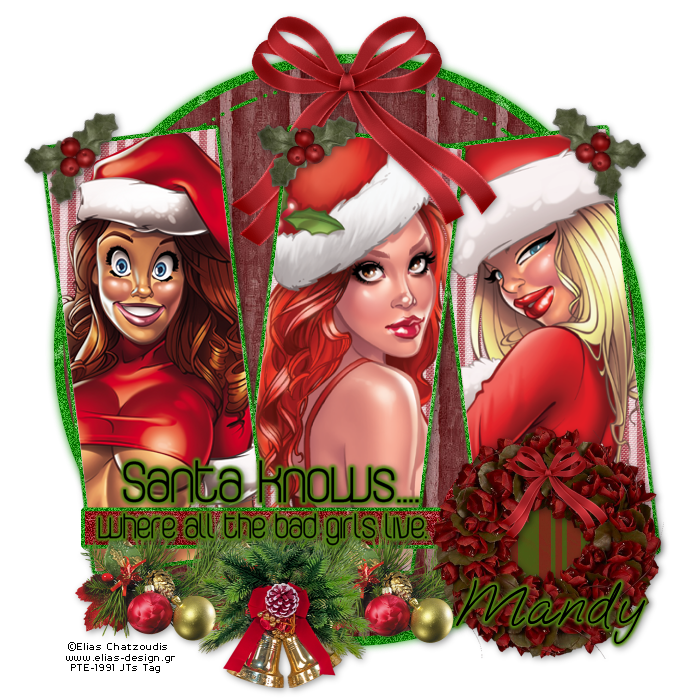
Santa Knows
This tut assumes your have a Good working knowledge of PSP.
Kit: A Beary Merry Christams by Diva's Designs you can purchase it here
Tube: Elias Chatzoudis, I used different tubes, you can purchase here
Mask: None
Template: by DeesDesignsDepot you can download here
Fonts: of choice I used OoohBaby which is a Rob font.
Shadow: 2,2, 40, 10
Filters: DSB Bright Noise, EyeCandy 5 Gradient Glow
PSP Filters used: None
sa-f-df-nl= Select All, Float, Defloat, New Raster Layer.
sa-f-df= Select All, Float, Defloat.
c/p= copy & paste
sa=select all
sn=select none
See finished tag for placement of tube/elements.
Let's begin.
Open tube and template in psp, duplicate the template and close the original.
In the template delete the credits, Top Purple Circle and Top White Circle layers.
Repeat the above step for the following layers, Dot N Dash, for all 3 purple rectangles and White Strip layer.
Duplicate Raster 1 Layer, on original Raster 1 layer go to Adjust Blur, Gaussian Blur, use 4 as your setting.
Select the Large Mauve Circle layer, sa-f-df-nl, c/p paper2 into selections, sn, hide template layer.
Select Purple Strip layer, sa-f-df-nl, c/p paper 7 into selections, sn, apply DSB Bright Noise same settings as before, hide template layer.
Repeat the above steps for Bottom Purple Circle layer.
Select the Mauve Left Rectangle layer, sa-f-df-nl, c/p paper 4 into selections, keep selected, c/p first tube as new layer, position, invert selections and hit delete, hide template layer.
Select Bottom White Circle, sa-f-df-nl, c/p paper 9 into selections, sn, hide template layer.
Select Word Art layer, apply EyeCandy 5 Gradient Glow, I used the Subtle White Glow settings, set the Glow radius to 5, colour used #528713
Now for the elements, I used the following:
Bow 2 @ 40%, duplicate this layer and resize again 40% for over the wreath.
Wreath @ 35%
Bell Decoration @50%
Holly @ 15%
Add your copy right and text.
All done.
Winters Chill PTU
 Click on pic for close up look!
After almost a year I've finally made a kit. Taggers are gonna love this one. It's choke full of awesome elements over 80 of them. Snowflakes, splatters, trails, ribbons, bows, trees the list goes on, lol, I couldn't fit everything into the preview. 24 amazing papers (no overlays used for these babies), 5 glitter sheets (not your regular glitter sheets either) and as a bonus (early Christams present I guess)I've included the 5 styles (PS only) that I creted used to create some of the elements with.
I know you'll love this kit.
Get it on sale at:
http://www.scrappetizing.com/store/
http://www.twilightscraps.com/
http://www.lollipopsngumdrops.net/store/
Gypsy Queen PTU

Gypsy Queen
This tut assumes your have a Good working knowledge of PSP.
Please remember to use license number when using a PTU tube.
Kit: Gypsy Queen by Baby Cakes Scraps you can purchase this gorgeous kit here
Tube: Rachel Anderson, you can purchase this tube at CDO
Mask: Vix_mask362 by Vix you can download here
Template: By Blissfully Beth you can download here, template packs are on the left of her page.
Fonts: Saginaw
Shadow: 2,2, 36, 6
Filters: DSB Bright Noise or a noise setting of your choice in PSP
PSP Filters used: Noise
sa-f-df-nl= Select All, Float, Defloat, New Raster Layer.
sa-f-df= Select All, Float, Defloat.
c/p= copy & paste
sa=select all
sn=select none
See finished tag for placement of tube/elements.
Let's begin.
Open your tube, mask and template in PSP, duplicate the template and close the original.
Selectthe background layer and add a new layer, sa, c/p Cloudy paper into selections, sn, apply your mask and merge group.
Merge layers 1, 2, & 3
Sa-f-df, c/p Dark Blend Paper as new layer, invert selelctions and hit delete, delete the template layer.
Select Grey Rectangle Frame layer, sa-f-df, c/p Glitter Borader paper as new layer, selections invert, hit delete, keep selected.
C/P Raster 4 layer of your tube (if you're using the same tube), position to the left, hit delete. Add a dropshadow, lower the oppacity to 48.
C/PRaster 2 layer of your tube as a new layer, resize 80%, go to Sharpen, Unsharpen Mask, use these setting: Radius 1, Strength 35, clipping 4.
Add a drop shadow.
Select the Black Frame layer, sa-f-df-nl, c/p Glitter Paper into selelctions, sn.
Now to add your elements, I used the following:
Deep Purple Bow @ 40%, use your deform tool to push the ends of the ribbon to line up with the edge of the frame. Duplicate image and merge down.
Glittery Flower @ 40 %
Purple Lace @ 50% use the deform tool to push in the edges of the lace.
Golden Leaves @ 25%
Glitter Butterfly @ 25%
Lavender Flower @ 35%
Add your copy right and text.
All done.
My Blue Christmas PTU

My Blue Christmas
This tut assumes your have a Good working knowledge of PSP.
Kit: My Blue Christmas by CuddleBees Designs you can purchase this kit at LollipopsNGumdrops.
This is a full sized kit so papers will have to be resized before using them.
Resize your papers to 800x800 pixels, elements should be resized 35% and sharpened once before following each step that involves an element from the kit.
Tube: Elias Chatzoudis pte-1663, you can purchase here
Mask: HorsePlay's Pasture Mask 19, you can download it here.
Template: by Designs by Vaybs, Vaybs_MisfitXmas5 you can download here near bottom of page.
Fonts: JellyK Delicious Cakes you can download here
Shadow: 2,2, 36, 6
Filters:
PSP Filters used: Noise filter
sa-f-df-nl= Select All, Float, Defloat, New Raster Layer.
sa-f-df= Select All, Float, Defloat.
c/p= copy & paste
sa=select all
sn=select none
See finished tag for placement of tube/elements.
Let's begin.
Open your tube, mask & template, duplicate the template and delete the credits & wordart layers.
Select the background layer and add a new layer, sa, (resize paper 800x800 pixels and sharpen once) c/p paper 6 into selections, sn, apply your mask and merge group.
Select Raster 1 layer, sa-f-df-nl, open paper 13 resize to 800x800 pixels, sharpen, c/p into selection on your new image, sn, add your favourite noise filter settings, I used Gaussian, Monochrome setting it at 45.
Open paper 10, resize 800x800 pixels.
In your template select Raster 2, go to Adjust, Hue & Saturation, settings at 0, sa-f-df, selections modify contract by 8.
Add a new layer, c/p paper 10 into selections, sn.
Repeat the above steps for the Raster 4 layer using paper 10.
Repeat again for rasters 3 and 5 using paper 7, remember to resize paper 7 first.
Select Raster 7, go to Adjust, Hue & Saturation settings at 0.
Select Raster 6, sa-f-df, c/p paper 10 as new layer, selections invert and hit delete, sn, hide your template layer for now.
Select Raster 8, sa-f-df-nl, c/p paper 8 into selections, sn.
Select Raster 9, go to Adjust, Hue & Saturation, settings at 0.
Select Raster 10, go to Adjust, Hue & Saturation, settings at 0.
While still in Raster 10, sa-f-df, selections modify contract by 8, add a new layer, c/p paper 10 into selections, sn.
Ok now you're ready to add your tube.
Select Raster 6 layer, sa-f-df, c/p the close up of your tube as a new layer, selections invert and hit delete, lower the opacity to 50.
C/P your tube as a new layer, positon.
Time to add your elements, I used the following:
Hanging Ornament @35% x2
Flower1 @35% x2
White Branch @ 35% x2, duplicate and mirror image.
Flower2 2 35% and then 50%
Add your copy right and text.
All done.
A Time To Remember PTU

A Time To Remember
This tut assumes your have a Good working knowledge of PSP.
Kit: Gemini Scraps, A Time To Remember, you can purchase this kit here
Tube: Anna Liwanag, you can purchase her tubes at PTE
Mask:Wee Scot Lass,WSL_Mask81, you can download here
Template:None
Fonts: JellyK Delicious Cakes you can download here
Shadow: 2,2, 36, 6
Filters: None
PSP Filters used: None
sa-f-df-nl= Select All, Float, Defloat, New Raster Layer.
sa-f-df= Select All, Float, Defloat.
c/p= copy & paste
sa=select all
sn=select none
See finished tag for placement of tube/elements.
Let's begin.
Open a new image 600x600 flood fill white.
Add a new layer, sa, c/p paper 02 into selelctons, sn.
Apply your mask and merge group.
C/P Frame 6 as new layer, resize 85%.
Using Magic Wand click inside Frame, selections modify, expand by 3 pixels.
C/P GreeneryPink1 as new layer, hit delete.
Hi-lite Mask layer.
C/P Butterfly Cluster resize 60%, duplicate this layer, go to Image Mirror, layers merge down.
Using Magic Wand click inside Frame, selections modify, expand by 3 pixels, hit delete, sn.
Duplicate this layer and Image Flip, merge these 2 layers down, add a drop shadow.
Using Magic Wand click inside Frame, selections modify, expand by 3 pixels, c/p Clock as new layer position to the right, selections invert hit delete, lower the opacity to 38, sn, move this layer below the frame layer.
Using Magic Wand click inside Frame, selections modify, expand by 3 pixels, c/p close up of tube as new layer, selections invert hit delete, move this layer below the frame layer.
Add any other elements you wish, I used the following:
Folded Ribbon, use your deform tool to rotate to your liking.
KeyString @ 35%
Fabric Flower 04 @ 50%
Stitches, use your erasor tool, brush size 24 to erase the edges you don't want.
Bow 01 @ 50%, use your deform tool the rotate to your liking.
Fabric Flower 03 @20%
Add your copy right and text.
All done.
One Of A Kind PTU

One of a kind
This tut assumes your have a Good working knowledge of PSP.
Kit: By Tammy, TLP Designz, TLP_Blue Dreams, you can purchase this kit here.
You can visit Tammy's blog here
Tube: Olivia, you can purchase this tube at Creative Designs Outet.
Mask:HorsePlay's Pastre Mask 27 you can download here
Template:Missy_tagtemplate281 at Divine Intentionz, you can download here templates are listed on the left side of her page.
Fonts: Halida you can get it here
Shadow: 2,2, 36, 6
Filters: DSB Bright Noise
PSP Filters used: None
sa-f-df-nl= Select All, Float, Defloat, New Raster Layer.
sa-f-df= Select All, Float, Defloat.
c/p= copy & paste
sa=select all
sn=select none
See finished tag for placement of tube/elements.
Let's begin.
Open tube, mask and template in PSP.
Duplicate the template and close the original, delete the credits and shape layer.
Increase canvas size to 700x600. You can resize later.
Click on background layer flood fill blank area with white.
Add a new layer, sa, c/p paper 1 into selections, sn, apply your mask and merge group.
Select Glittered Oval layer, sa-f-df-nl, c/p paper 7 into selections, sn, apply DSB Bright Noise, setting 49-Mix, delete template layer.
Select Oval layer, sa-f-df, c/p paper 10 into as new layer, selections invert hit delete, sn, delete template layer.
Select Circle layer, sa-f-df-nl, c/p paper 10 into selections, sn, delete template layer.
Select Wordart layer, go to Adjust, Hue & Saturation settings at 0, go to Adjust, Colour Balance, Manual Color Correction, Source Color=0C0C0C, Target color=2A726C.
Repeat these steps for the Star 2 layer.
Add your elements, I used the following:
Fan @ 65%
Flower @40%
Bugs @30%
Folden ribbon @ 50%
Butterfly @30%
Bow @ 30% x2
Button @30%
Add your copy right and text.
All done.
Sprial

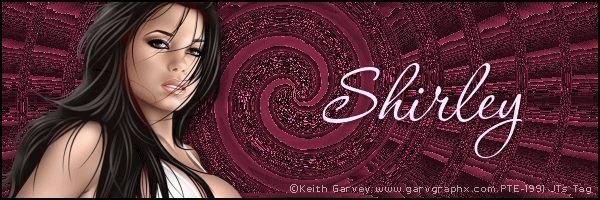
Spiral
This tut was created by JTsDesigns. Any similarities to other tuts are coincidental.
Filters used in this tut: Krusty Vol.1 Generator B-1.
Tube by Keith Garvey available here.
Open a new image 600x600.
Apply Krusty Vol. 1 Generator B-1, change the Green% setting to 66.
Go to Effects, Edge Effects, Enhance.
Open a new image 600x250, select all, c/p the 600x600 image into selections, name this layer Back1.
Copy & paste your tube as a new layer and position to the left.
Add a new layer and flood fill with black, selections all, contract by 2 pixels hit delete.
Add your text and copy right.
Hide your Back 1 layer and Merge Visible.
You should now have only 2 layers.
Hide your tube layer, c/p the Back1 layer into Animation Shop (AS) as a new animation.
Edit paste as new animation again so that you have 2 copies of the Back1 image open.
Activate one of the Back1 Images and duplicate the frames so that you have 10 frames, minimize for now.
In the other Back1 images go to Effects, Insert Image Effect, from the drop down menu select Spiral.
Click on Customize and type in 5116 as the Maximum Angle, and Canvas Colour (black) is selected.
Click ok in the windows.
You should now have 13 frames.
Click on Frame # 4, hold down your shift key and click on frame #13, you should now have 10 frames hi-lited.
Go Edit, Copy.
Activate the other Back1 frame.
Go to Edit, Propogate Paste,
Edit, Select All,
Edit, Paste Into Selected Frame.
It's important that you do not move your mouse, just simply left click and it will center in your image.
This is your new animation, now lets get the tube layer to add on top.
Back to PSP.
Hide your Back1 layer, unhide your tube layer and select that layer, copy and paste as new animation in AS.
Duplicate this frame so that you have a total of 10 frames.
Go Edit, Select All
Edit, Copy.
Activate the New animation.
Go to Edit, Propogate Paste,
Edit, Select All,
Edit, Paste Into Selected Frame.
Hover the image over the first frame slightly to center the frame as it is a little smaller than the the Back1 frames for some reason, once satisfied with it's position left click once.
All done, save as a gif.
On The Veranda PTU

On The Veranda
This tut assumes your have a Good working knowledge of PSP.
Kit: On The Veranda by Butterfly Kisses Scraps you can purchase here
Tube: Barbara Jensen you can purchase this tube here
Mask: by me, JTsDesigns, you can get it here

Template: MC_Template33 from Melissa's Creationz you can download it here
Fonts: Saginaw
Shadow: 2,2, 36, 6
Filters: None
PSP Filters used: Gaussian Blur
sa-f-df-nl= Select All, Float, Defloat, New Raster Layer.
sa-f-df= Select All, Float, Defloat.
c/p= copy & paste
sa=select all
sn=select none
See finished tag for placement of tube/elements.
Let's begin.
I recoloured the tubes outfit to co-ordinate with the kit, this is allowed with this tube.
Open your tube, mask and template in PSP, duplicate the template and close the original.
In you template delete the following; credits, shapes and "perfect 10" layers.
Image canvas size 600x600 Center.
Unhide the Raster 1 layer and flood fill white, add a new layer, sa, c/p paper 2 into seletions, sn, duplicate this layer, on orginal layer go to Adjust, Gaussian Blur setting 38.61, resize this layer 95%
Select Large Circle layer, sa-f-df-nl, c/p paper 14 into selection, sn, delete the template layer.
Repeat the above step for the Rectangle Frame layer.
Select the Sm Circle layer, sa-f-df-nl, c/p paper 15 into selection, sn, delete the template layer.
Select the Double Squares layer, sa-f-df, c/p paper 2 as new layer, selections invert and hit delete.
Select the Rectangle Background layer, sa-f-df, c/p paper 6 as a new layer, selections invert and hit delete, keep selected.
C/P your tube as a new layer, position to the left, hit delete. Add a drop shadow, change the Blend Mode to Luminance Legacy.
C/P your tube again and move to the right, add a drop shadow.
You can now add your elements, I used the following:
Sparkle02 @ 100%
Ribbon01 @ 65%
Spill01 @ 45% then 65%
Ribbon03 65% then 65%
Flower02 @ 25%
Butterfly01 @ 20%
Add your copy right and text.
All done.
Punk Rock Fun PTU

Punk Rock Fun!
This tut assumes your have a Good working knowledge of PSP.
Kit: Punk Rock Fun by AmyMarie you can purchase her kits here
Tube: VeryMany, EMOlution5, you can purchase here
Mask:WSL_Mask 81 which you can download here
Template: None
Fonts: P22 Corinthia, it's a pay font but any nice script font will do.
Shadow: 2,2, 36, 6
Filters:
PSP Filters used:
sa-f-df-nl= Select All, Float, Defloat, New Raster Layer.
sa-f-df= Select All, Float, Defloat.
c/p= copy & paste
sa=select all
sn=select none
See finished tag for placement of tube/elements.
Let's begin.
Open a new image 600x600 flood fill white.
Add a new layer, sa, c/p paper 11 into selelctions, sn, apply your mask and merge group.
C/P Glitter Splatter 2 as new layer, resize 90%, move down on your image,
C/P Glitter Splatter 3 as new layer.
C/P Wireframe 1 as new layer resize 80%.
C/P the Glass Star Chain as a new layer, use magic wand click inside Wire frame, selection invert, on the star chain layer hit delete, sn, move this layer to just above the mask layer.
C/P your tube as a new layer.
Select your Frame layer and duplicate, move this above your tube layer in your layers pallet.
Use your erasor tool to erase top part of the frame that covers the head, select your tube layer and delete anything that is showing below the bottom of the frame.
Add a drop shaow to your tube and bottom frame layer.
Now to add your elements, I used the following:
Color Guitar 2 @ 80%
Devil Heart 2 @ 75%
Glass Star 1 @ 50%
Glass Brad 6 @ 12%
Add your copy right and text.
I added a gradient glow and shadow to my name but that's optional.
All done.
Hocus Pocus Life's A Witch PTU

Hocus Pocus Life's a Witch
This tut assumes your have a Good working knowledge of PSP.
Kit: Hocus Pocus by Le Paradis Du Scrap which you can purchase here.
Tube: Elias Chatzoudis which you can purchase here
Mask:Vix_Halloween2010No1 you can download this pack here
Template: by BlissfullyBeth, this is template pack101-110 ( packs are lised on the left of her blog) a great set of halloween templates you can get them here
Fonts:Jellyk Delicious Cakes you can download it here
Shadow: 2,2, 36, 6
Filters: DSB Bright Noise,
PSP Filters used: Noise,
sa-f-df-nl= Select All, Float, Defloat, New Raster Layer.
sa-f-df= Select All, Float, Defloat.
c/p= copy & paste
sa=select all
sn=select none
See finished tag for placement of tube/elements.
Let's begin.
Open the, mask and template in psp, duplicate the template and close the original.
In the template delete the credits and the Grey Rect Frame layers.
Starting at the bottom select the Raster 1 layer, add a new layer flood fill white, delete the Raster 1 layer.
Add a new layer, sa, c/p paper 11 as a new layer, apply your mask and merge group.
C/P E13 (eyes from the elements folder) as a new layer.
Select the Dotted Oval layer, sa-f-df-nl, c/p paper 2 into selelctions, sn, delete the template layer, apply DSB Bright Noise45-Mix or use your favourite noise settings in PSP.
Open paper 5 and make into your foreground pattern setting the Repeats at 0 and the scale at 10, select the Vert Black Line 2, sa-f-df, flood fill with the pattern, sn.
Repeat this step for the Vert Balck Line 1 layer.
Select the Orange Oval layer, sa-f-df-nl, c/p paper12 into slelctions, sn, delete the template layer.
Select the Black Half Circle layer, sa-f-df c/p paper 13 as a new layer, selelctions invert, hit delete, keep selected.
C/p your tube (layer 2 if you're using the same tube) as a new layer position over the half circle and hit delete, sn.
C/P the same tube again and place directly over the first tube, use your erasor to erase any overlap that you don't want showing.
Give this layer a deep drop shadow, I used 4, 4, 36,6 make sure "Shadow On New Layer" is checked.
Apply the same shadow on the New shadow layer and the again on the next shadow layer this will give the appearance of her popping out.
This is for the benefit of those of us out there that don't have Loka's Shadow lab lol.
I applied DSB Bright Noise to the "and then you fly" and Witch Orange layers.
Now for the elements, I used the following:
E1 @ 80%
E13 @ 8%
E15 @ 20%
E34, copy and paste as a new layer, use your erasor to erase overlap, set your erasor hardness to 0, use the mask layer as your guide.
Once your happy with the results grey scale the moon and lower the opacity to 94.
E9 @ 20%
E44 @ 20%
Add your copy right and text.
All done.
Devilish Tease PTU

Devilish Tease
This tut assumes your have a Good working knowledge of PSP.
Kit: Devilish Tease by Angels Designz, you can purchase her kit here
Tube: Keith Garvey, you can purchase his tube here
Mask: by Horseplay's Pasture, mask 19, you can download from here
Template: by Horseplay's Pasture, template 131, you can download from here
Fonts: Quastic Kaps Line you can download it here
Shadow: 2,2, 36, 6
Filters: Xero, Porcelain (optional)
PSP Filters used: None
sa-f-df-nl= Select All, Float, Defloat, New Raster Layer.
sa-f-df= Select All, Float, Defloat.
c/p= copy & paste
sa=select all
sn=select none
See finished tag for placement of tube/elements.
Let's begin.
Open your tube/s, mask and template, duplicate the template and close the original.
In the template delete the following; Credit & Strip layers.
Select the back ground layer, add a new layer, sa, c/p paper 11 into selections, sn.
Apply your mask and merge group.
Select Circle 1 layer, sa-f-df, c/p paper 3 as new layer, selections invert, hit delete. Delete template layer.
Repeat this step for Circle 2 layer.
Select Back Right Rectangle, sa-f-df-nl, c/p paper 1 into selelctions,sn, delelte teplate layer.
Repeat this step for Back Left Rectangle layer.
Select Oval Back layer, sa-f-df, c/p paper 11 as new layer, selections invert, hit delete.
Select Oval layer, sa-f-df, c/p paper 4 as new layer, selections invert, hit delete, keep selelcted.
C/P close up of tube as new layer, hit delete, sn.
Select the Top Rectangle, sa-f-df, c/p paper 9 as new layer, selection invert, hit delete, keep selections, c/p paper 5 as new layer, hit delete, keep selected, invert selelctions, modify, contract by 4 pixels, hit delete, sn.
Select the Top Rectangle, sa-f-df, c/p tube as new layer position, selelctions invert hit delete, apply Xero Porcelain filter using only the Red Channel set at 255 the others at 0.
Repeat the above steps for the Bottom rectangle.
C/P your tube as new layer.
You can now add the elements, I used the following:
Mask @ 50%
Razor @ 30%
Lips @ 30% then again @ 50%
Devil Heart @ 50%
Heart Chain @ 100%
Feather @ 80%, position to the left, duplicate and mirror.
Add your copy right and text.
All done.
BST Forum
