Rebecca Sedwick Collab


 >
>


Color Correction
Once you get the hang of it it's realy quite simple.
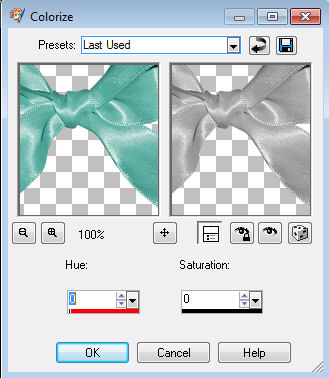
You will need to greyscale what ever you are colouring first. Go to Adjust, Hue and Saturation.
Use these settings:
 Next go to Adjust, Color Balance, Manual Color Correction:
 In the window that pops up you'll notice a few things, the most important of those are the SOURCE and the TARGET.

The source color will define how light or dark the finished color will be. The source color should always be a shade of GREY. If your grey source shade is a light shade of grey the finished color will be Dark and if your grey source color is a dark shade of grey the finished color will be Light.
First lets pick out Target color, I chose the color # 35557E (blue) as my target color, it's a good idea to make a note of the color number somewhere, this is the color I wish my image to be once I'm done.
To get as close as possible to the correct finished color LEFT click on the source color box, you will notice that your cursor has now changed to an EYE DROPPER, use the eyedropper to click on your greyscaled image, click on a dominant shade of grey in your image, then click OK. Your source color has now changed.
You will also see that your Target color has changed the color of the image to the blue that I picked.
As you can see in the image below the ribbon I'm changing is now very close to th color number I chose.

You will need to greyscale what ever you are colouring first. Go to Adjust, Hue and Saturation.
Use these settings:


|
| Dark Source Color |
 |
| Light Source Color |
To get as close as possible to the correct finished color LEFT click on the source color box, you will notice that your cursor has now changed to an EYE DROPPER, use the eyedropper to click on your greyscaled image, click on a dominant shade of grey in your image, then click OK. Your source color has now changed.
You will also see that your Target color has changed the color of the image to the blue that I picked.
As you can see in the image below the ribbon I'm changing is now very close to th color number I chose.

Subscribe to:
Posts
(Atom)
BST Forum
