Rebecca Sedwick Collab
Let's Chat!
Enter Block content here...
Lorem ipsum dolor sit amet, consectetur adipiscing elit. Etiam pharetra, tellus sit amet congue vulputate, nisi erat iaculis nibh, vitae feugiat sapien ante eget mauris.
Monday, October 3, 2011
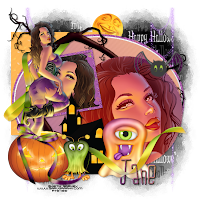
Spooktacular FTU
3:36 PM
| Posted by
Jane

Spooktacular!
This tut assumes your have a Good working knowledge of PSP.
Kit: Monster Ball VIP Room, by Digicats, you can download it here
An awesome kit Dianna, thank you for your generosity.
Tube: Elias Chatzoudis, pte4172, Pumpkinella you can purchase from here
Mask:Vix_Halloween2010No1, you can download from here
Template:Missy_tagtemplate288, you can download here
Fonts:LD Jilly Nilly, you can download here.
Shadow: 2, 2, 36, 6
Filters: DSB, Bright Noise or your favourite noise setting in PSP, Pentacom, Jeans
PSP Filters used: Noise
sa-f-df-nl= Select All, Float, Defloat, New Raster Layer.
sa-f-df= Select All, Float, Defloat.
c/p= copy & paste
sa=select all
sn=select none
Let's begin.
Open your tube and template.
In your template delete the first 5 layers and the Glittered rectangle layer.
Increase your canvas size to 650x650, flood fill the background layer with white so you can see what you're doing.
Add a new layer and flood fill black, apply your mask and merge group.
Select your square layer, click once with magic wand. c/p paper04 into selections, sn.
Apply Pentacom Jeans using these settings, Amount 58, Borderwidth 2, Interval 2.
Select Glittered Oval1 layer, sa-f-df-nl, c/p paper02 into selelctions,sn, delete template layer.
Apply DSB Bright Noise, setting 43, Mix or your favourite PSP noise setting will do.
Repeat these steps for the Glitter Frame Layer.
Select Oval layer, click once with magic wand add a new layer and flood fill with gradient use
884879 Foreground & DF9669 Background colours set at 45 degrees, apply Pentacom, Jeans using these settings, Amount 58, Borderwidth 2, Interval 2.
Select the Circle layer, click with your magic wand add a new layer and flood fill with your gradient but with the angle set at 224.
Selections Modify Contract by 3 pixels, apply your noise filter again.
Select, Modify, Expand by 3.
Keep selected.
Keep selected.
C/P Layer 1 of your tube (large close up) as a new layer, position,
invert selelctions and hit delete.
Change to Blend mode to Overlay.
Select the Frame background layer, click once with magic wand, c/p paper2 as a new layer, selections invert and hit delete.
Selections Invert again. C/P your 2nd Tube layer as a new layer,
Change to Blend mode to Overlay.
Select the Frame background layer, click once with magic wand, c/p paper2 as a new layer, selections invert and hit delete.
Selections Invert again. C/P your 2nd Tube layer as a new layer,
Invert selections and hit delete.
Add your elements, you can use my tag as a guide.
Add your copy right and text.
All done.
Add your elements, you can use my tag as a guide.
Add your copy right and text.
All done.
Subscribe to:
Post Comments
(Atom)


 >
>


0 comments:
Post a Comment